Soho - Clean Multi-Purpose WordPress Theme
Responsive Creative AJAX/Parallax Theme
- created: 06/05/2014
- latest update: 06/06/2014
- by: Select Themes
- demo.select-themes.com/soho/
- email: support@select-themes.com
Welcome to Soho - Clean Multi-Purpose WordPress Theme
Introduction
Installing SOHO Theme
You can install this WordPress theme using two installation methods:
- Using WordPress Administration Panel
- Copying theme files via ftp
METHOD 1
Using soho.zip found in ZIP file you downloaded from ThemeForest.com you should perform the following steps:
- Login to WP admin
- Go to Appearance > Themes option and click on it to load new page
- Select Install Theme tab at the top of the panel to load new page
- Click on Upload option at the top of the panel to load new page
- Click on Browse button and locate soho.zip on your file system
- Click on Install Now button
- Once installation is complete you can activate Soho theme
METHOD 2
Using soho directory found inside of soho.zip file located inside ZIP file you downloaded from ThemeForest.com you should perform the following steps:
- Using FTP client you should login to server where your WordPress web site is hosted
- Using FTP client you should navigate to /wp-content/themes/ directory under your WordPress web site’s root directory
- Using FTP client upload soho directory to themes directory on remote server
- Once installation is complete you can activate Soho theme
Installing WooCommerce
If you plan to build online shop with our theme, please read WooCommerce section of this documentation before you install demo content.
Importing Demo Content
If you would like to learn the best practice of using SOHO theme, you can import content from our demo web site. Our theme comes with one-click import module. Importing demo web site is performed by following these steps:
- Open WP Admin Panel
- Click on Select Options > Select Import from left menu
- Select All from Import select box
- Check Import attachments checkbox if you want to import images
- Click on Import button
In order to import LayerSlider demo slider, you need to locate xml export folder in the theme's All files & documentation zip file you can download from your Downloads page at ThemeForest. You will find LayerSlider_Export.zip file there. Just go to LayerSlider option in the left menu and upload that file under Import section.
Upgrading SOHO Theme
You can upgrade our theme by performing following steps:
- Download latest theme zip file from ThemeForest
- Extract it and locate soho.zip
- Extract soho.zip and locate soho folder
- Copy/Replace the content of soho folder to /wp-content/themes/soho folder of your web site.
Feel free to ask us any question about using features SOHO theme offers.
Important F.A.Q.
-
Can't save menu - Wordpress by default have limited number of menu items. When you import our demo site, which contains lot of menu items, you might not be able to save changes you make to menu. You can fix this problem by contacting your hosting and asking them to add following lines to php.ini file:
- suhosin.post.max_vars = 5000
- suhosin.request.max_vars = 5000
- Smiley displayed on blank page - Problem is probably related to JetPack and memory settings of your hosting. You can either disable JetPack or read what JetPack developer wrote: Regarding the memory limit, please refer to the WordPress Codex section concerning this problem. Some sites that load many plugins alongside WordPress ultimately require a higher memory limit than WordPress defaults to, but since this is limited to specific hosts and configurations, it must be dealt with on an individual basis. You'll find the Codex article at:
-
How to optimize my site? - Please use this tool to investigate reasons for slow loading: https://developers.google.com/speed/pagespeed/insights/?hl=en
-
How to translate or rename default theme labels? - You can use Codestyling localization plugin (http://wordpress.org/plugins/codestyling-localization/) to translate/rename all theme's labels. Other solution is to edit theme folder/languages/en_US.po file directly in editor and manually edit labels you want to translate.
-
White screen when importing demo content - If you get white screen or some error when you try to import our demo content, this probably happens because of maximum execution time limit. You need to increase maximum excution time (upload time) setting of your web server. Default maximum execution time on web servers is 30 seconds. Please increase it to 120 seconds. Possible ways of achieving this are:
-
By Wp-config.php Changes - set_time_limit(120);
-
In htaccess - php_value max_execution_time 120
-
In php.ini file - max_execution_time = 120;
-
Ask your hosting provider to take care of that for you
-
-
Shortcode displayed on blog lists? - This is happened because excerpt for blog list or portfolio list can't read shortcodes and because of that we implemented Excerpt field for each blog single, portfolio single, page etc. You just need to go in your back-end for example Posts -> Some post -> And below text editor or Visual Composer, you can find Excerpt section, just add here text you want to display for that post on your blog list.
Theme Options
Access the “Select Options” in the left menu. Some of these options may be overridden locally, in the shortcode or page settings (e.g. text color in editor or page title layout in the Select Custom Fields while editing post/page/portfolio item).
Most options in these tabs are self-explanatory. Explanations for options that need further clarification will be provided here.
GLOBAL OPTIONS
Colors
The elements of SOHO theme are made up from main colors.
- First main color (text color and area color) - default color is #91003e
- Second main color (text color and area color) - default color is #080808
Content background image
Here you can set background image for your content. It will be applied both for boxed and full width version.
Body background image
Here you can set background image for your whole site. It will be applied both for boxes and full width version.
Body pattern background image
Here you can set pattern background image for your whole site. Note that if you set pattern background image, background image option won't be applied.
Favicon image
Set this field to the image that you want to use as your favicon.
Page transition
Choose between predefined AJAX animations between pages. This scenario will be applied to all pages. Eventually it is possible to change the animation style for each page individually (options below text editor when editing pages/posts). Please note that you can turn off AJAX for certain pages there. That might be important for some other plugins to work properly.
Boxed
With this field you can control box layout for your site
Loading animation
Here you can turn ON/OFF display of loading image while navigating between pages using page transitions (AJAX)
Loading image
With this field you can change our loading image like you want, if Page transition and Loading animation are set to ON
Smooth scroll
With this field you can control smooth scroll effect for your site. You can choose between no smooth scroll, yes and yes but not on Mac devices.
Responsiveness
With this field you can control responsiveness for your site
Show back button
With this field you can control back button feature
Elements animation on mobile/touch devices
With this field you can control animation for elements(shortcodes) on touch devices
Google Anaylitics Account ID
With this field you can monitor the traffic on your website
List of internal URLs loaded without AJAX (separated with comma)
Here you can put URLs of the pages you want to get loaded without AJAX. You should enter full url (including domain part) here, for example: http://www.mydomain.com/forum/
Custom CSS and Custom JS
Advanced users can add their own code here.
Meta Keywords
Add relevant keywords separated with commas to improve SEO.
Meta description
Enter a short description of the website for SEO.
Disable Select SEO
Here you can disable Select SEO functionality. You should do this if you are using some SEO plugin.
GENERAL FONT OPTIONS
This section allows you to setup font properties for different elements of the site. (color, hover/active color, font family, font size, line height, font style and font weight)
- Global fonts
- Headings
- Text
- Link
- Header menu
- Mobile menu
- Left Menu
HEADER AND FOOTER
Header in grid
Set if header is full width or grid (content) width
Show header top area
This setting applies to Header Left and Header Right widgets.
Scroll header top area
This setting will make header top area scroll with main menu if fixed header bottom style is choosen.
Header bottom appearance
With this option you can choose different styles of main navigation behaviour and position
Scrolled amount for sticky appear
With this setting you can set amount of scroll needed for sticky menu to appear
Header style
If chosen will make header elements (logo, main menu, side menu icon) in chosen predefine style: dark or light
Header height (initial, scrolled and sticky)
This option is important for defining the height of whole header including the logo
Logo
Add website logo here. You can upload different logo images for light & dark header style (if used) and for sticky header (displayed on scroll)
Center logo
If selected will display logo centered above the menu
Menu position
This setting lets you choose menu position (default / center)
Top background color
This is background color of the top header widget area
Bottom background color (initial, sticky, scrolled and for mobile)
This is background color of the header
Transparency (initial, scrolled and sticky)
This is transparency of the header
Dropdown main menu
Here you can choose whether to animate dropdown entrance, change background color of it, choose separator color for wide dropdown type, set dropdown transparencty and choose pattern background image.
Enable Select Search
This option enables Select Search functionality (search icon will appear next to main navigation)
Header Buttons (Select Search icon, Side Area icon and Mobile Menu icon)
This section lets you customize buttons that appear inline with main navigation (side area opener, mobile menu opener and search icon)
Uncovering footer
This setting lets you enable footer uncovering effect (content revealing footer on scroll event)
Footer in grid
Set if footer is full width or grid (content) width
Show footer top
This option will show main footer widget area. You can define its content in Appearance > Widgets > Footer Columns 1-4
Footer top columns
Set how many columns footer top area has.
Show footer bottom
This option will show bottom footer widget area. You can define its content in Appearance > Widgets > Footer Text
Footer separator color
This option lets you set footer separator color
Footer top colors
This section contains settings for color management of titles and anchors on top footer
Footer top background image
Set background image for footer top section
Footer bottom colors
This section contains settings for footer bottom color management
TITLE
You can setup here global page title properties which can be overriden in select custom fields for each post/page.
Title type
Choose between standard title or with breadcrumbs
Enable breadcrumbs
This setting enables beadcrumbs in title area. Applied only for standard title type
TItle height
This setting allows you to set height of title area in pixels and is used if image is not set to be responsive.
Animate title area
This setting lets you choose starting position of the title area.
Title position
This setting allows you to set position of title text.
Title background color
This setting allows you to set background color for title
Title text background
Here you can turn on / off box around text int title
Title text background color
Here you can choose background color for title text box if enabled
Title image
This setting allows you to choose default background image for title area.
Use title image as pattern
Lets you use selected title image as pattern (it will repeat itself horizontally and vertically)
Title pattern overlay image
This setting allows you to set default overlay pattern image for title area.
Responsive title image
This setting allows you to make image resize to fit into browser width. Title are height will be defined by height of the image after it resizes to fit the browser width.
Parallax title image
Use selected title image as parallax. Applied only if title image isn't set to be responsive
Page title style
This section contains settings for title style management
Text shadow
This setting allows you to enable or disable text shadow on title and background color lets you set background color of title area.
Show separator and Separator color
This fields allows you to enable separator in title area and to control separator color
LEFT MENU AREA
Here you can manage left menu area properties (show/hide, colors and fonts)
If Left Menu Area is enabled, it will show area in the left containing logo, menu and left area widgets. Normal header will be disabled.
Enable transparent left menu area - Left Menu Area will be transparent when page is scrolled to the top. Also, when transparent, dark/ligh color change logic will be applied
Left menu area background - Choose background color of left menu area
Left menu area background image - Choose background image for left menu area - Image will be fixed and it will fit the left menu area
Left menu area text color (for widgets) - Choose the widget text color
Left Menu Area Menu Style options are used to define style of menu items.
Please note that at the page level you can set background color, transparent left menu are and background image specific just for that page and override global values defined here.
You can drag additional content to this area in Appearance > Widgets > Left Menu Area widget area.
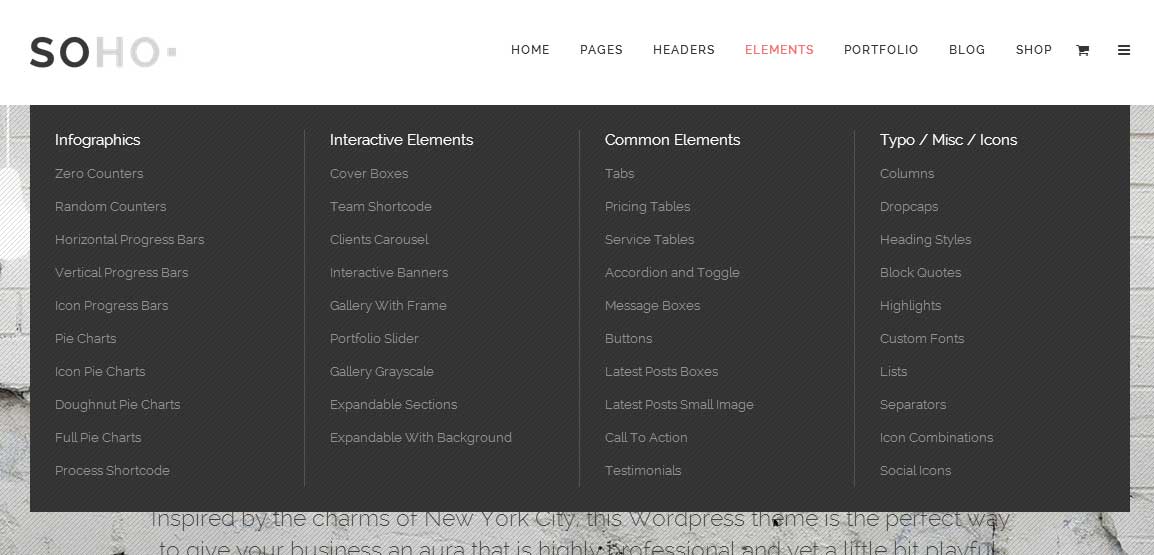
ELEMENTS
Here you can define style properties of different elements. Options chosen here will override default settings for shortcodes and other elements that you can use. This section is divided in smaller sections, each one controlling on:
- Accordion
- Blockquote
- Buttons
- Content input fields (used on contact form, comments form etc.)
- Unordered List
- Message
- Pricing Tables
- Horizontal Progress Bar
- Vertical Progress Bar
- Pie Charts
- Separator
- Tabs
- Testimonials
SIDE AREA
Here you can manage side area properties (show/hide and colors)
Fields in this section are:
- Enable Side Area
- Side Area Title
- Background Color
- Text Color
- Title Color
CONTENT BOTTOM AREA
Here you can set global settings for content bottom area displaying just above footer. You can choose which custom widget area should be used to fill in this area with content. For example, you can create Call to Action widget.
Fields in this section are:
- Enable Content Bottom Area
- Content Bottom Sidebar to Display
- Content Bottom in Grid
- Background Color
PARALLAX
Parallax on touch devices
This setting lets you enable or disable parallax on touch devices
Parallax min height
This setting lets you set parallax section's minimal height for last two responsive stages
PORTFOLIO
Here you can define global setting for portfolio list and portfolio single page.
Show Portfolio Select Like
This setting lets you enable or disable like featured for portfolio list
Portfolio style
This setting lets you choose portfolio style for single project.
- portfolio full width images
- portfolio small images
- portfolio full width slider
- portfolio small slider
- portfolio custom layour in grid
- portfolio gallery
- portfolio custom layout full width
Enable lightbox for Single project
This setting lets you enable or disable lightbox featured for portfolio list
Number of columns for Portfolio Gallery style
This setting lets you choose number of columns per row for single gallery project.
Portfolio single slug
This setting lets you define portfolio slug for your project. Default value is portfolio_page.
Show categories
This setting lets you enable or disable category description in portfolio single project.
Enable portfolio text following
This setting lets you enable or disable text following featured on portfolio single project for Portfolio Small image and Portfolio Small slider style
BLOG
Here you can define global properties for blog list and blog single pages. You can override those properties at post level.
Pagination
This setting lets you enable or disable pagination featured for blog list.
Choose Pagination on Masonry type
This setting allows you to choose pagination featured for blog masonry list. You have three types of paginations,
- Pagination
- Load More
- Infinite Scroll
Show category filter on masonry style
This setting lets you enable or disable filter featured for blog masonry list.
Choose blog layout
This setting allows you to choose blog layout for blog list.
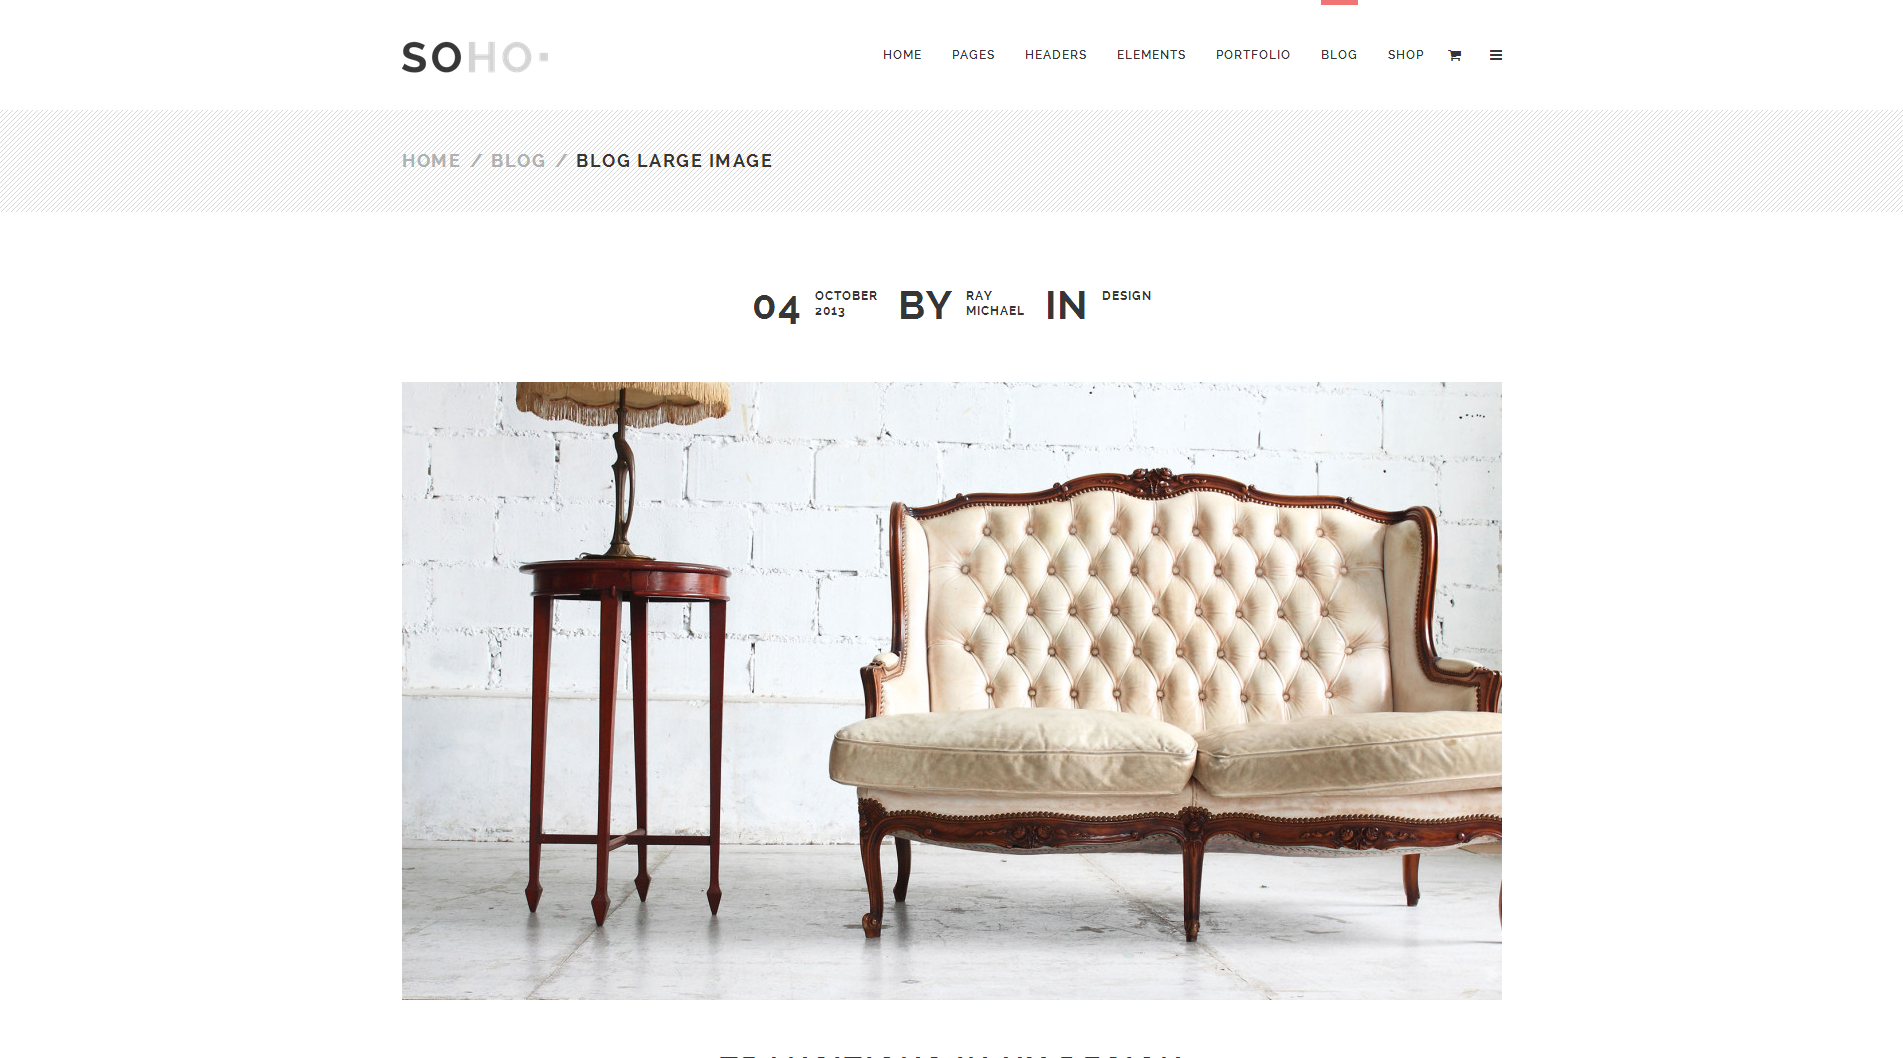
- Blog Large Image
- Blog Large Image Whole Post
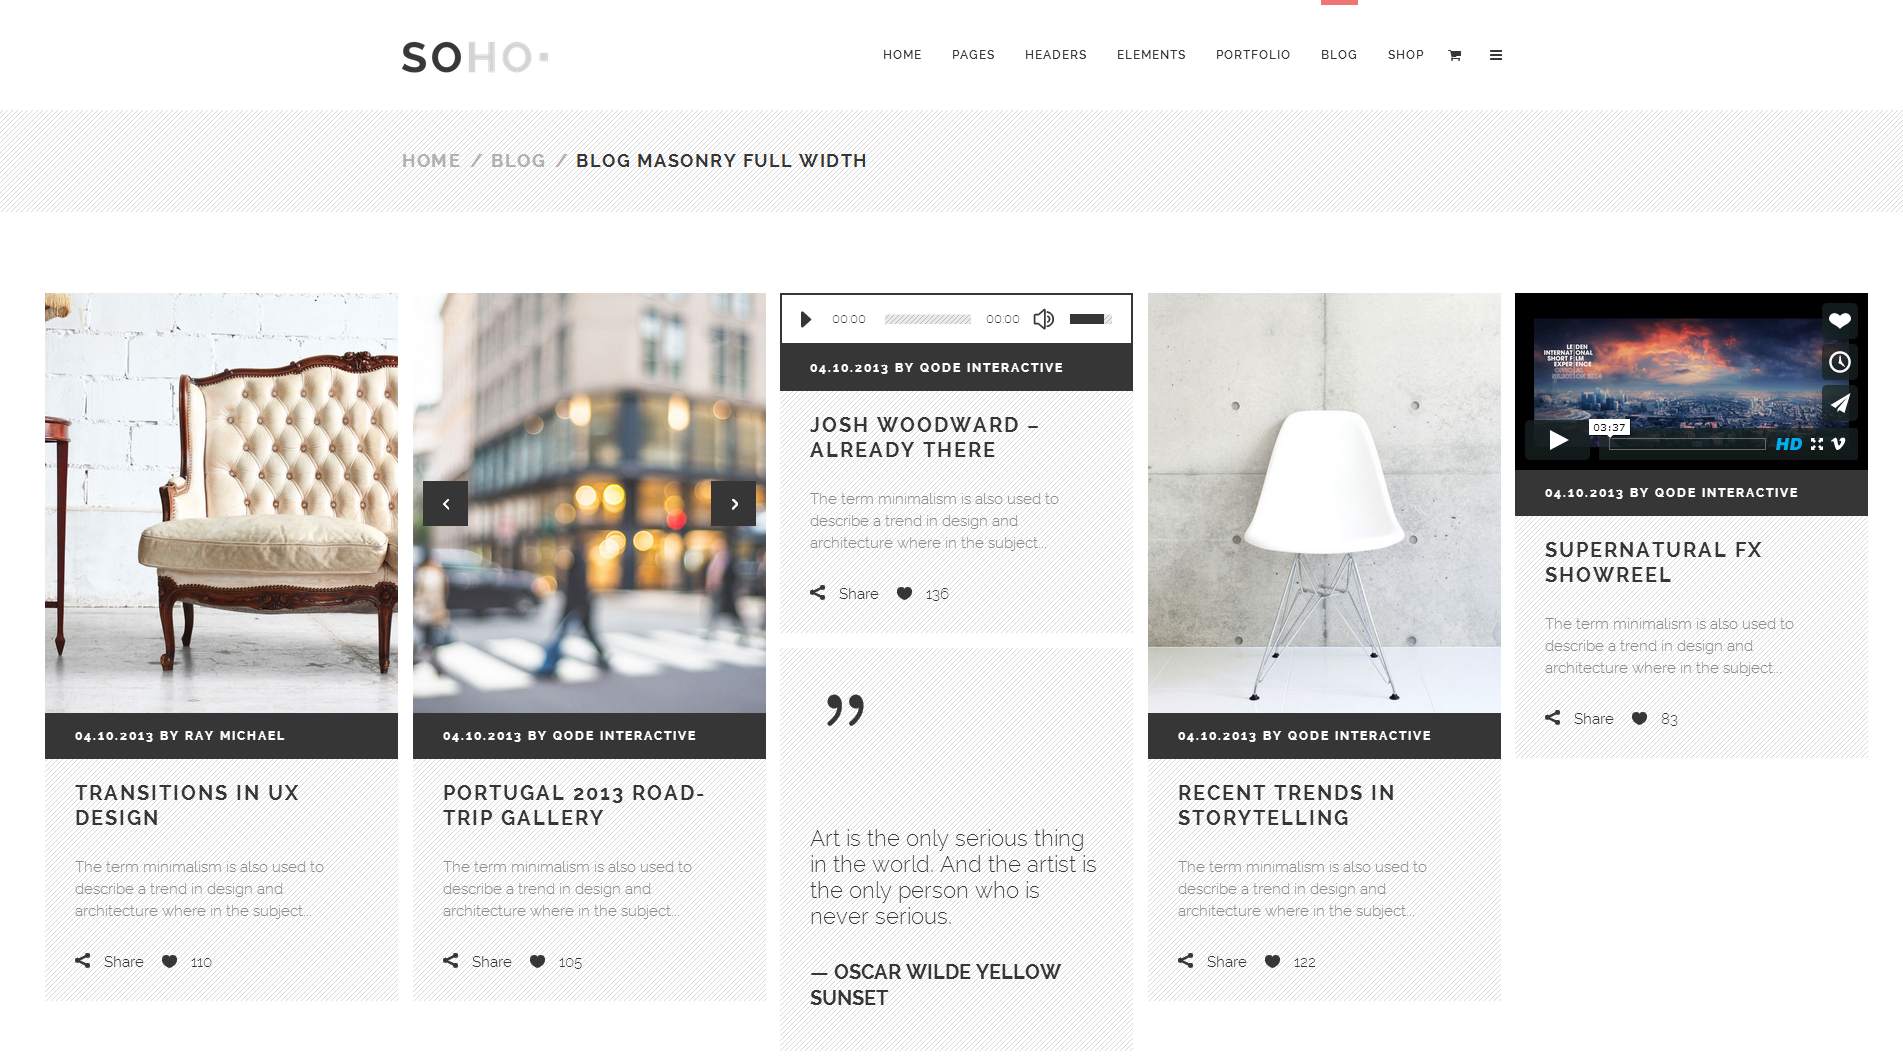
- Blog Masonry
- Blog Masonry Fullwidth
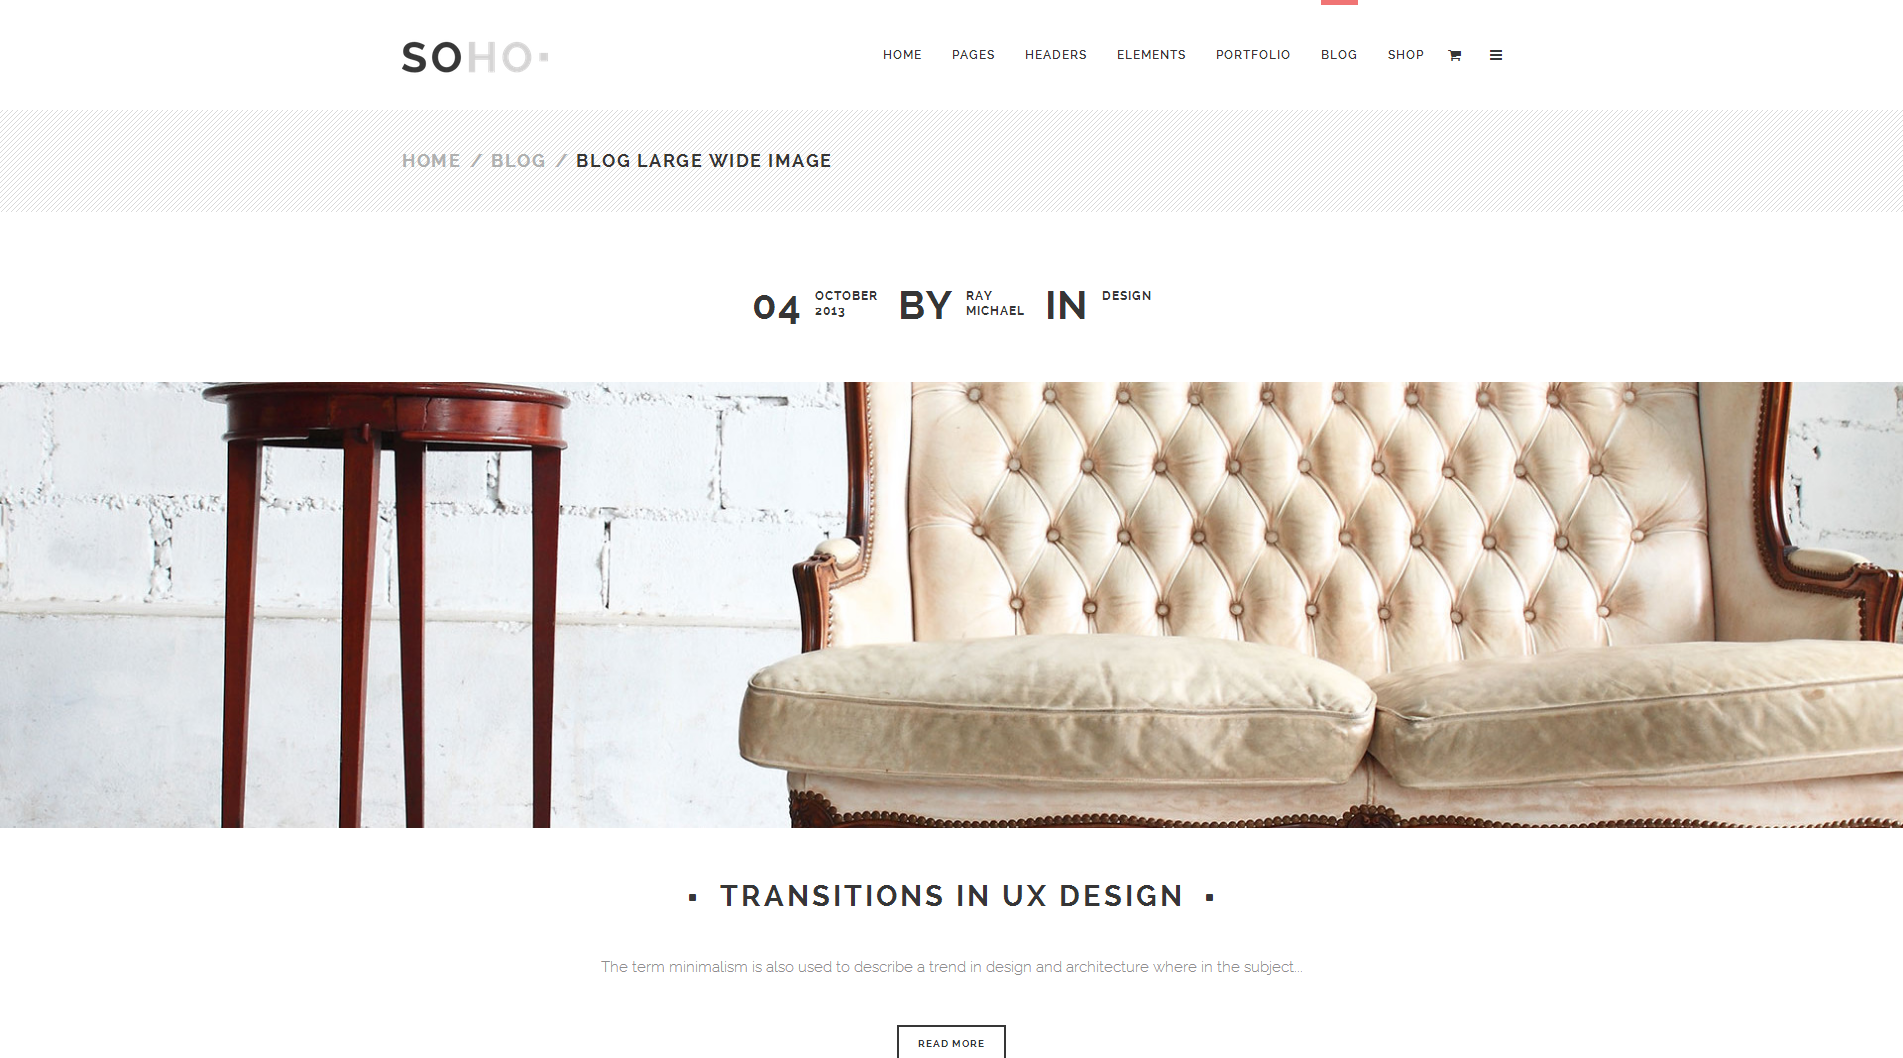
- Blog Large Image Wide
- Blog Large Image Whole Post
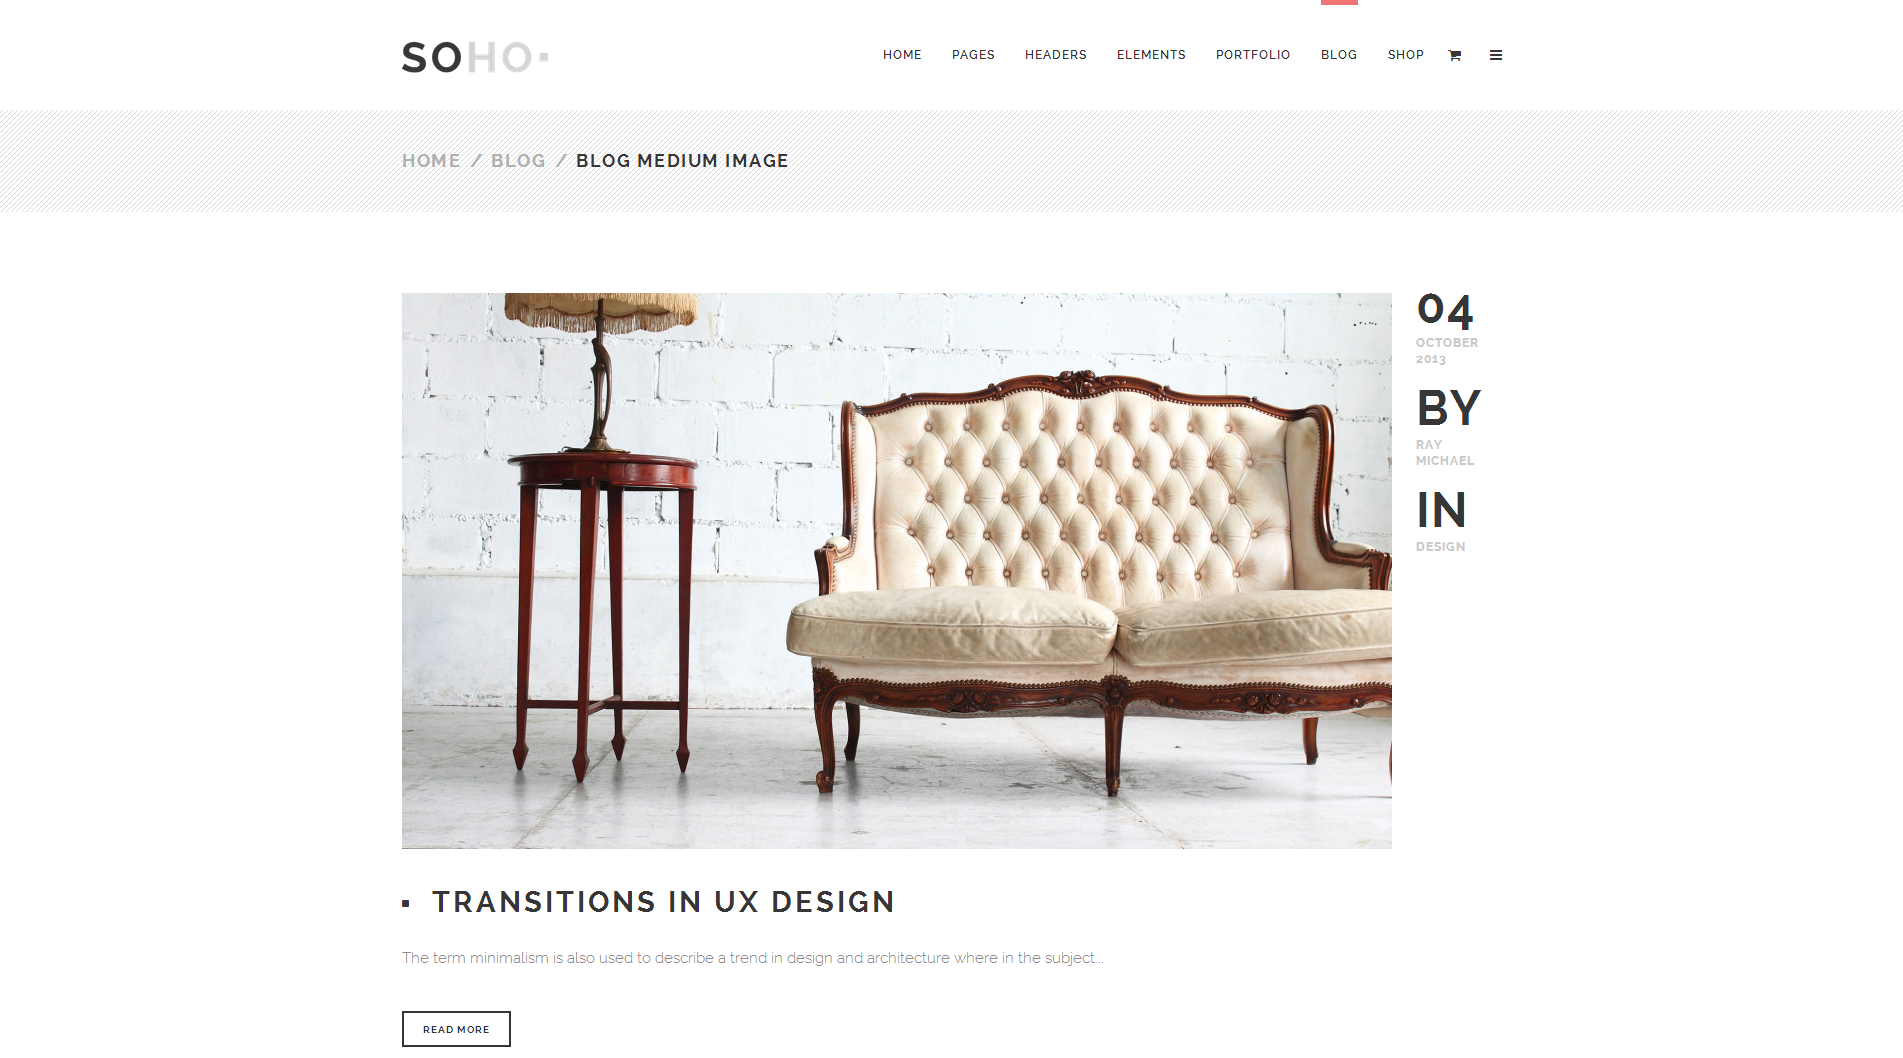
- Blog Medium Image
- Blog Medium Image Whole Post
Blog sidebar
This setting allows you to choose sidebar layout for blog list.
- No Sidebar
- Sidebar 1/3 right
- Sidebar 1/4 right
- Sidebar 1/3 left
- Sidebar 1/4 left
Hide comments
This setting lets you enable or disable comments featured for blog list.
Page range for pagination
This setting allows you to set number of posts per page.
Number of words (excerpt)
This setting allows you to set number of characters for blog excerpt text.
Number of words in masonry blog template
This setting allows you to set number of characters for blog masonry excerpt text.
BLOG SINGLE
Hide post title
Option that lets you show / hide blog post title
Blog single sidebar layout
This setting allows you to choose sidebar layout for blog single.
- No Sidebar
- Sidebar 1/3 right
- Sidebar 1/4 right
- Sidebar 1/3 left
- Sidebar 1/4 left
Sidebar to display
This setting allows you to choose custom sidebar to display.
Blog Select Like
This setting lets you enable or disable like featured for blog single.
Show Blog Author
This setting lets you enable or disable author featured for blog single.
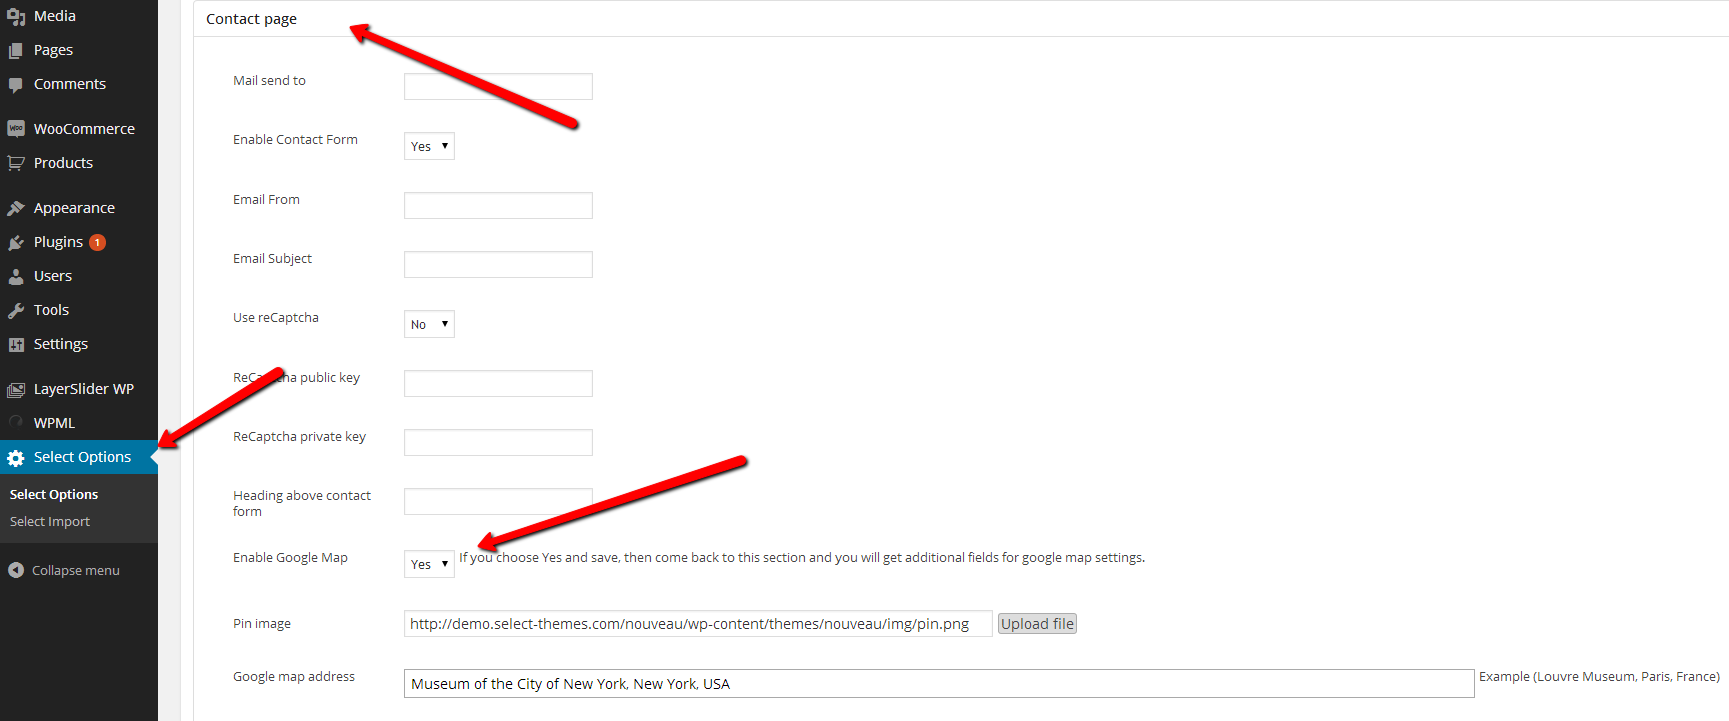
CONTACT
Mail send to
Here you should enter email address. Contact form data will be sent to this address.
Email from
Here you should enter email address. This address will be displayed as sender when sending contact form data.
Email subject
Here you should enter email subject.
reCaptcha
You can enable reCaptcha and enter keys generated here http://www.google.com/recaptcha/whyrecaptcha.
Heading above content
This setting allows you to change heading above contact form. Default value is Contact Us
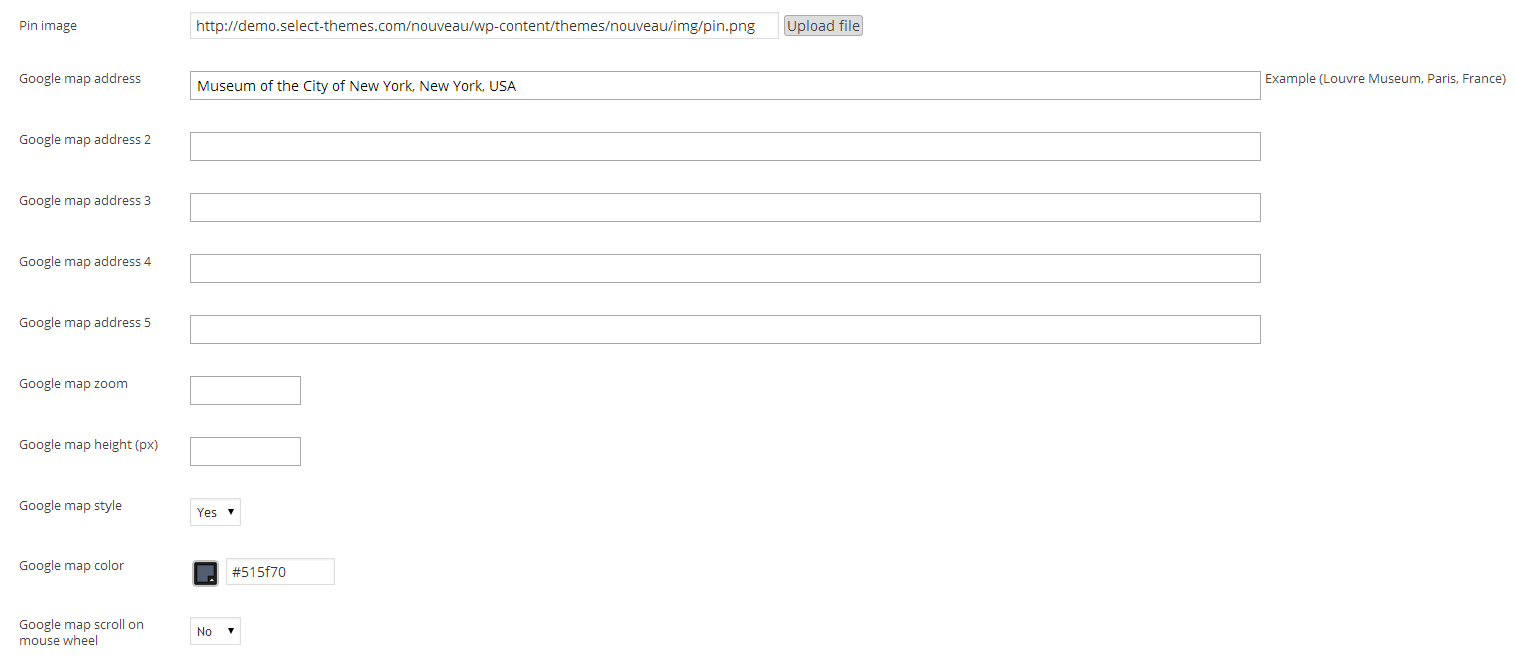
Pin image
You can upload your own image used to mark your address on the map
Google map address (1-5)
You can define up to 5 different locations do display on your map. You should enter address in normal address format, for example: 100 Battery Street, San Francisco, USA.
Google map zoom
You can enter here google map zoom level (default is 15).
Google map height
You can define here height of map area on the page
Google map style & Google map color
If style is enabled, you can set color used to paint the map
Google map scroll on mouse wheel
Turn ON/OFF scrolling of the page when mouse is over the map. That disables/enabled map zoom.
404 PAGE
Here you can define content of 404 error page.
Fields in this section are:
- Title
- Text
- Back to home label
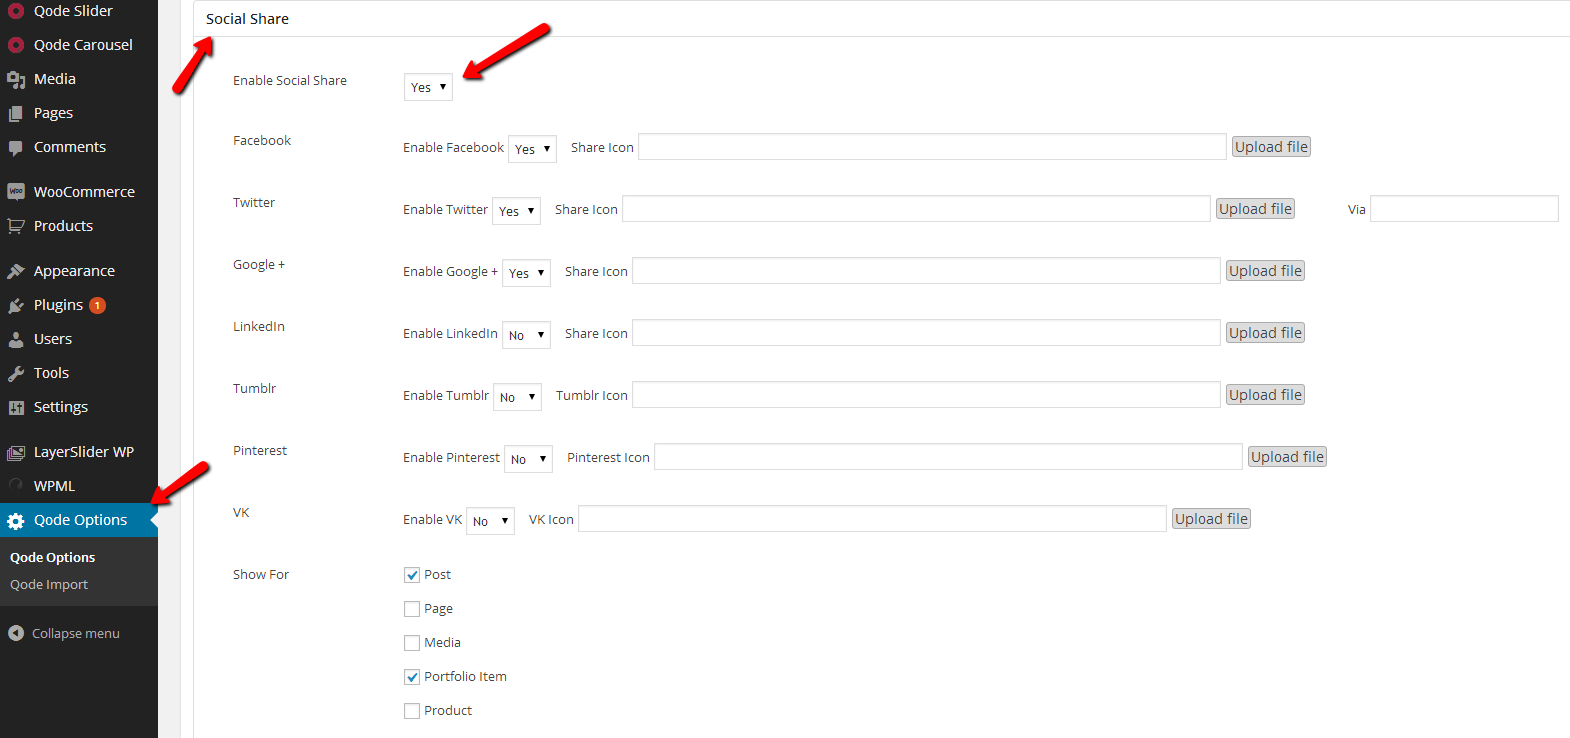
SOCIAL
Here you can manage social share features.
Fields in this section are:
- Enable social share
- Google +
- Thumblr
- VK
- Show Social share in (Post, Page, Portfolio items etc.)
WooCommerce
Here you can manage woocommerce features.
Fields in this section are:
- Content top padding for Shop
- Separator color for product items in shop list (between tiitle and price)
- Hide title for single product
- Single product content top padding
Menu
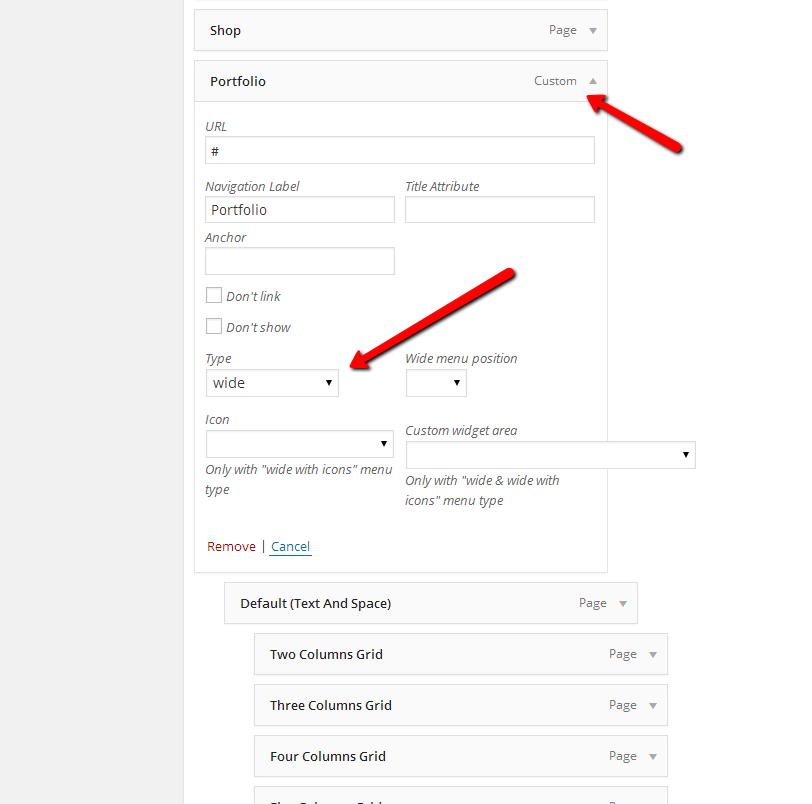
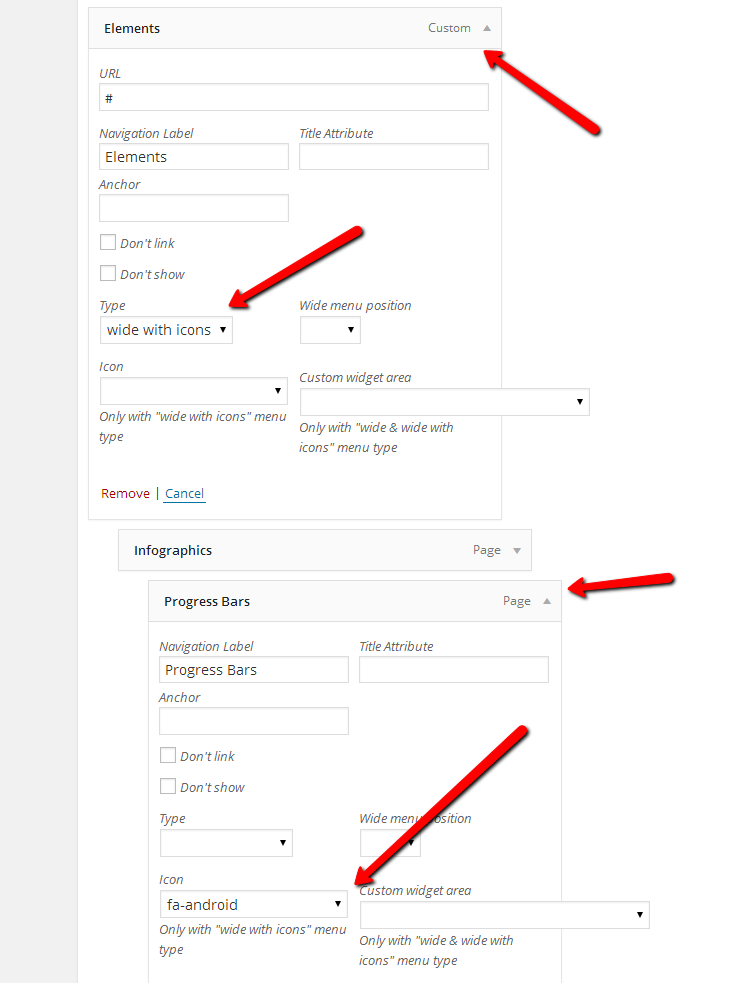
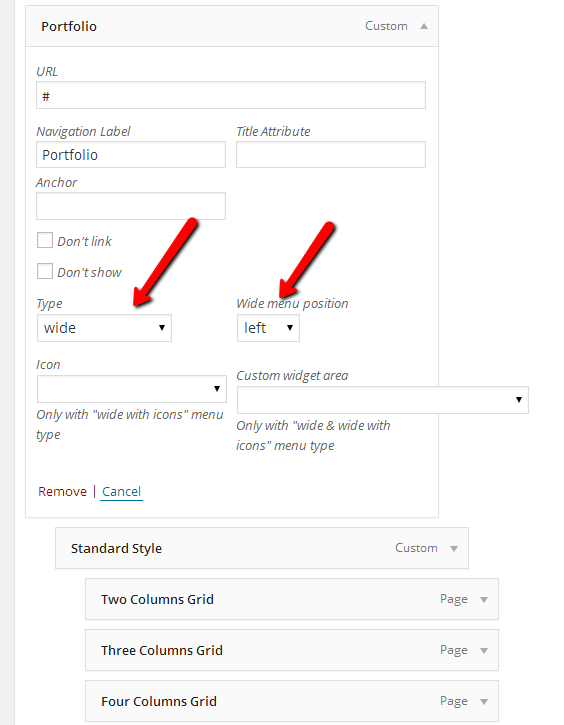
SOHO theme comes with "mega" menu. It supports three type of sub-menu options at the sime time:
- normal drop-down menu (default option)
- wide menu
- wide menu with icons (Font Awesome Icons)
Type option is applied only to 1st level menu items.
There are three additional options that apply only to wide menu type:
- Don't link - will show label without link
- Don't show - it will not render that menu option (it will still render its children options)
- Wide menu position (default is center, left or right)
Also, you can add widgets to the menu if you choose widgets area in the "Custom widget area" select box (listing custom sidebars in Appearance > Widgets)
Main Menu Dropdown examples
- Default Menu Dropdown
- Wide Dropdown
- Wide With Icons Dropdown
- Wide With Position Dropdown
Default Main Menu Dropdown
Wide Dropdown
Admin options for wide dropdown menu
Admin options for wide with icon dropdown menu
Wide With With Left Position Dropdown
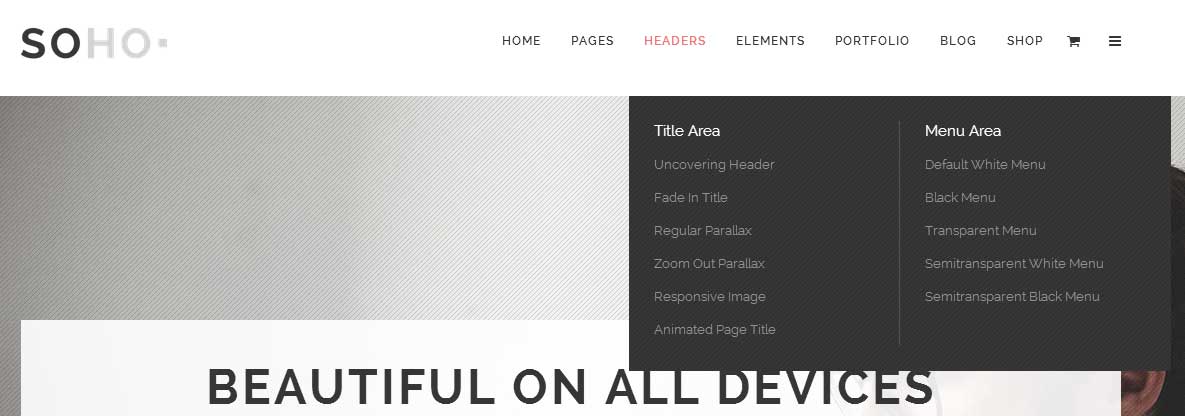
Admin options for wide with position dropdown menu
ANCHORS (ONE PAGE SITE FUNCTIONALITY)
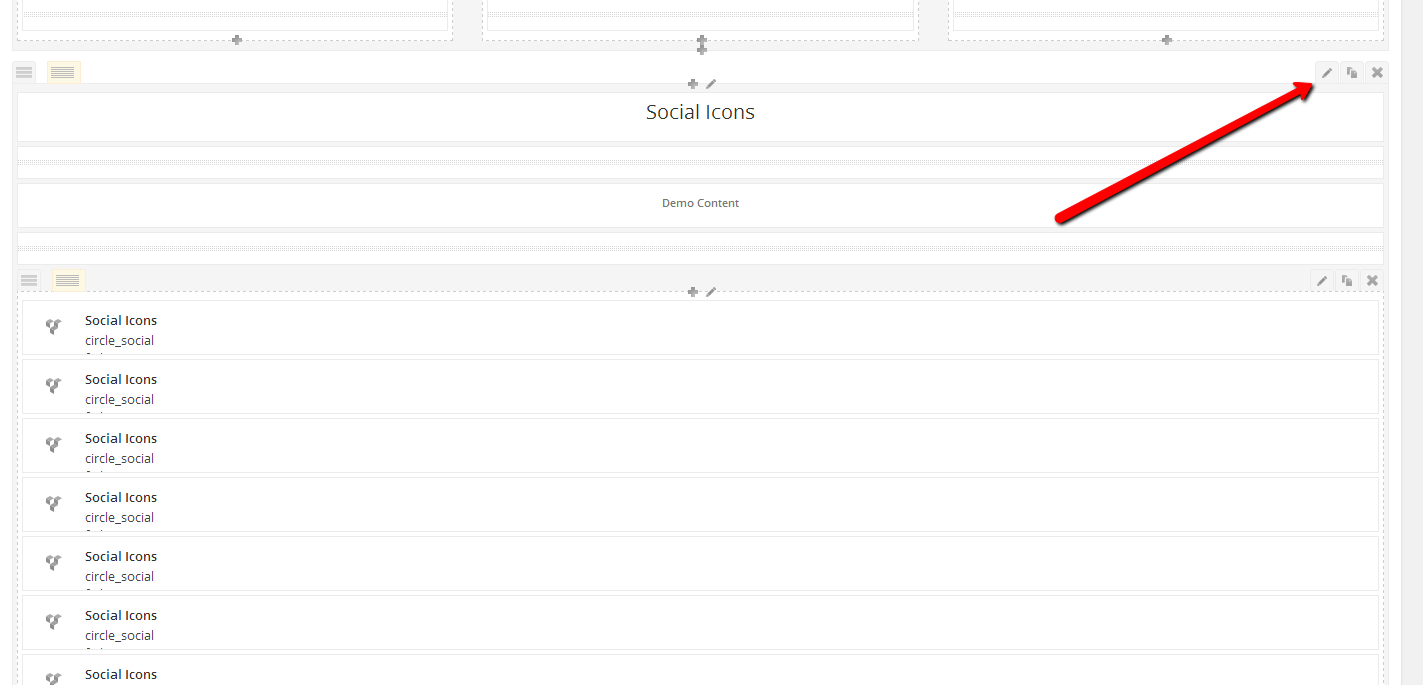
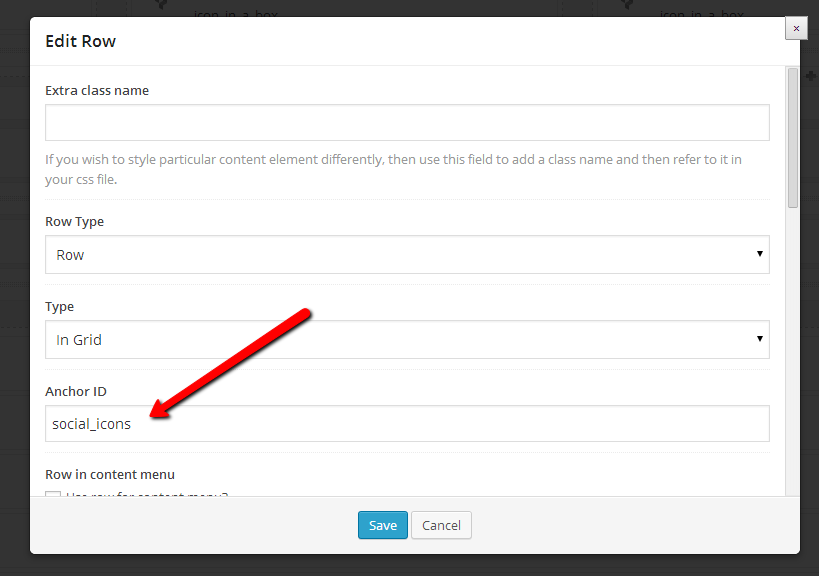
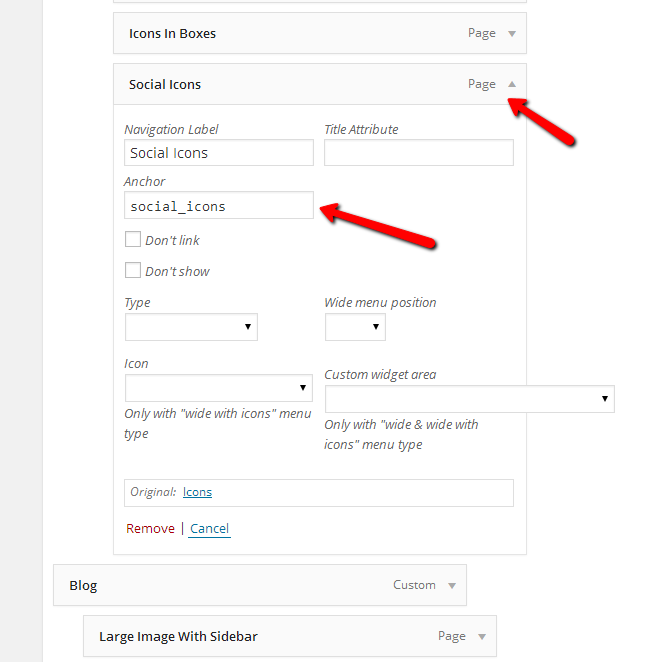
You can add anchors to menu items in order to scroll to the element on the page. In order to do that you need to perform following steps:
- You need to set anchor ID(s) while editing page. You can do that by editing properties of the row element in Visual Composer. You will find Anchor ID field there. You can type in any text there (without empty spaces).
- You can repeat step 1 for several rows of the page
- You can how edit menu and add multiple page items to the menu, all for the same page containing anchors.
- Edit each menu item and type in ID of the anchor in Anchor field
Example of anchor usage
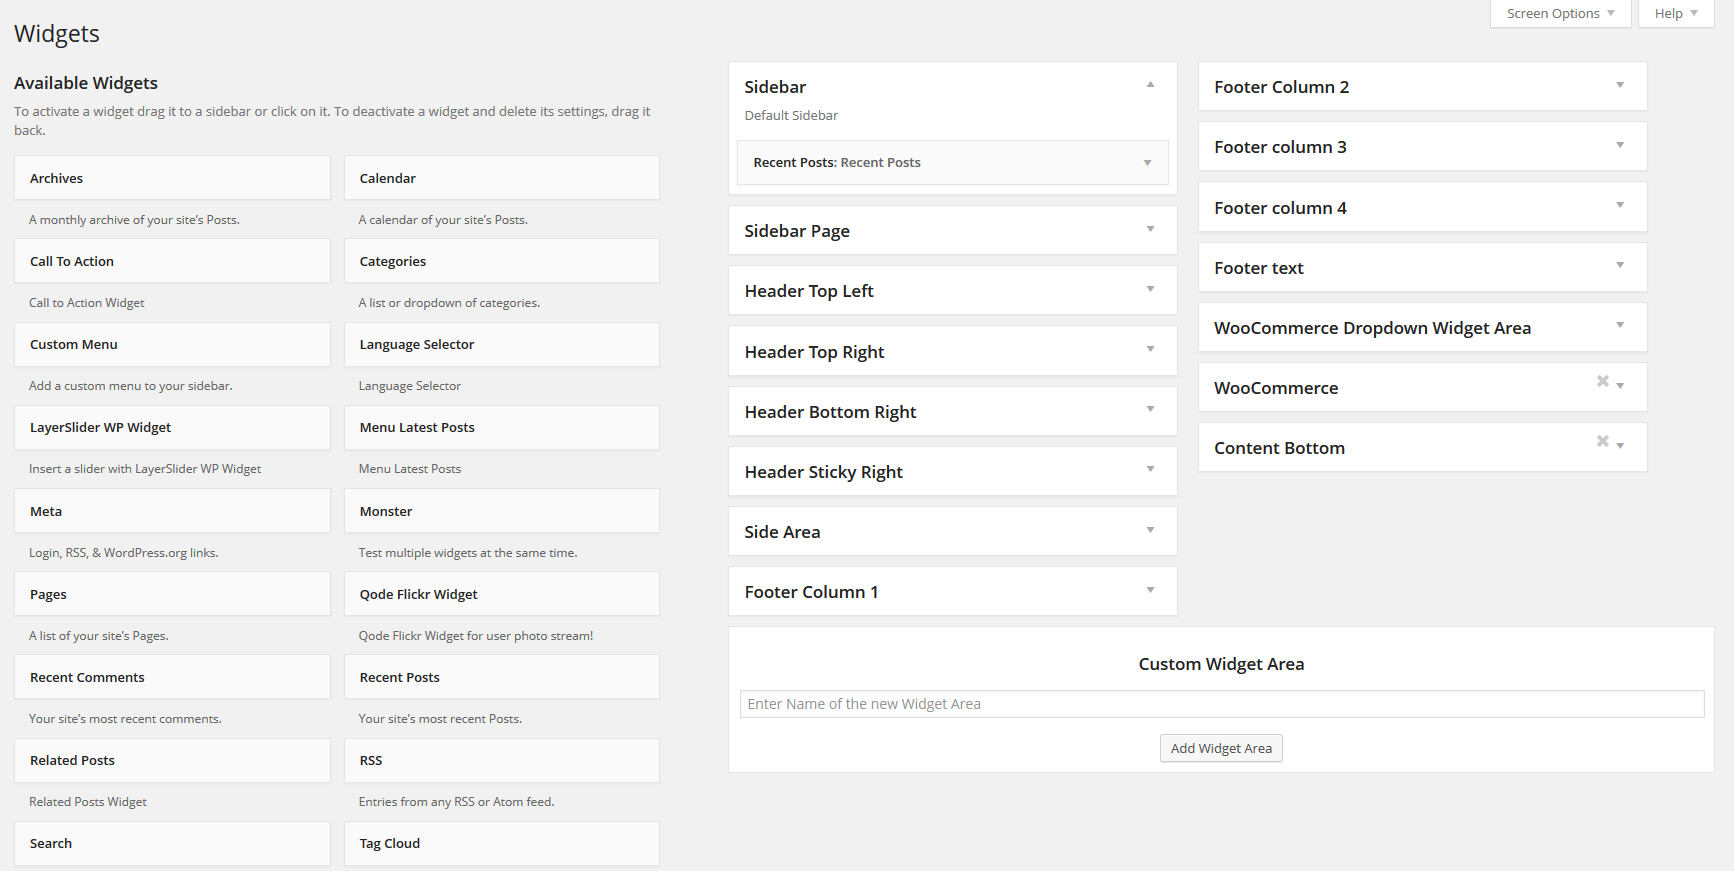
Widgets
Soho Theme comes with following custom widgets and widget areas:
- Sidebar - it's used only for blog posts
- Sidebar Page - it's used only for pages
- Header Top Left - here you can add anything to the left side of the top header area
- Header Top Right - here you can add anything to the right side of the top header area
- Header Botom Right - here you can add anything to the right side of the menu
- Header Sticky Right - here you can add anything to the right of the sticky menu
- Side Area - here you can add widgets to side menu
- Footer Column 1, Footer Column 2, Footer Column 3, Footer Column 4 - here you can add content to footer columns (1-3) in footer top area when four columns layout is selected
- Footer Text - here you can add for example copyright
- WooCommerce Dropdown Widget Area - This widget area should be used only for WooCommerce dropdown cart widget
Soho theme allows adding mutliple sidebars. You can define your custom widget areas (sidebars) from the Custom Widget Area section in the bottom right corner of this page.
You can see example of widgets configurion from our demo web site here:
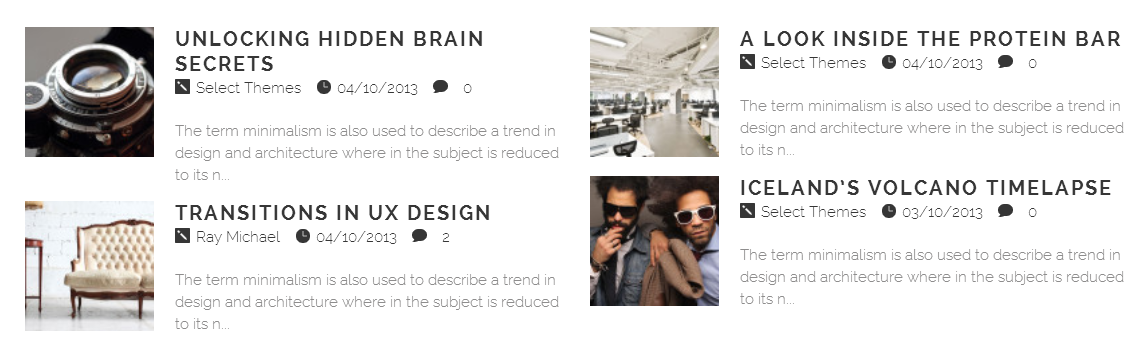
Blog
BLOG LIST
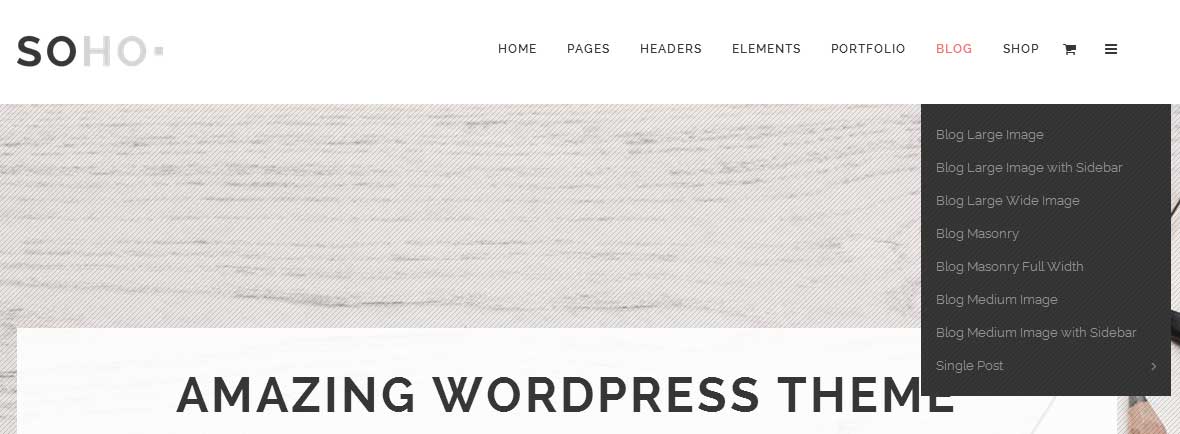
In order to create a blog page, first create a new page and select one of 4 Blog Templates listed in Template field located in the “Page Attributes” section:
- Blog Large Image - Displayes featured image above post title and excerpt
- Blog Large Whole Post - Same as large image template but displays full blog post content
- Blog Large Image Wide - Displays featured image in full width above title and excerpt
- Blog Large Image Wide Whole Post - Same as large image full width template but displays full post content
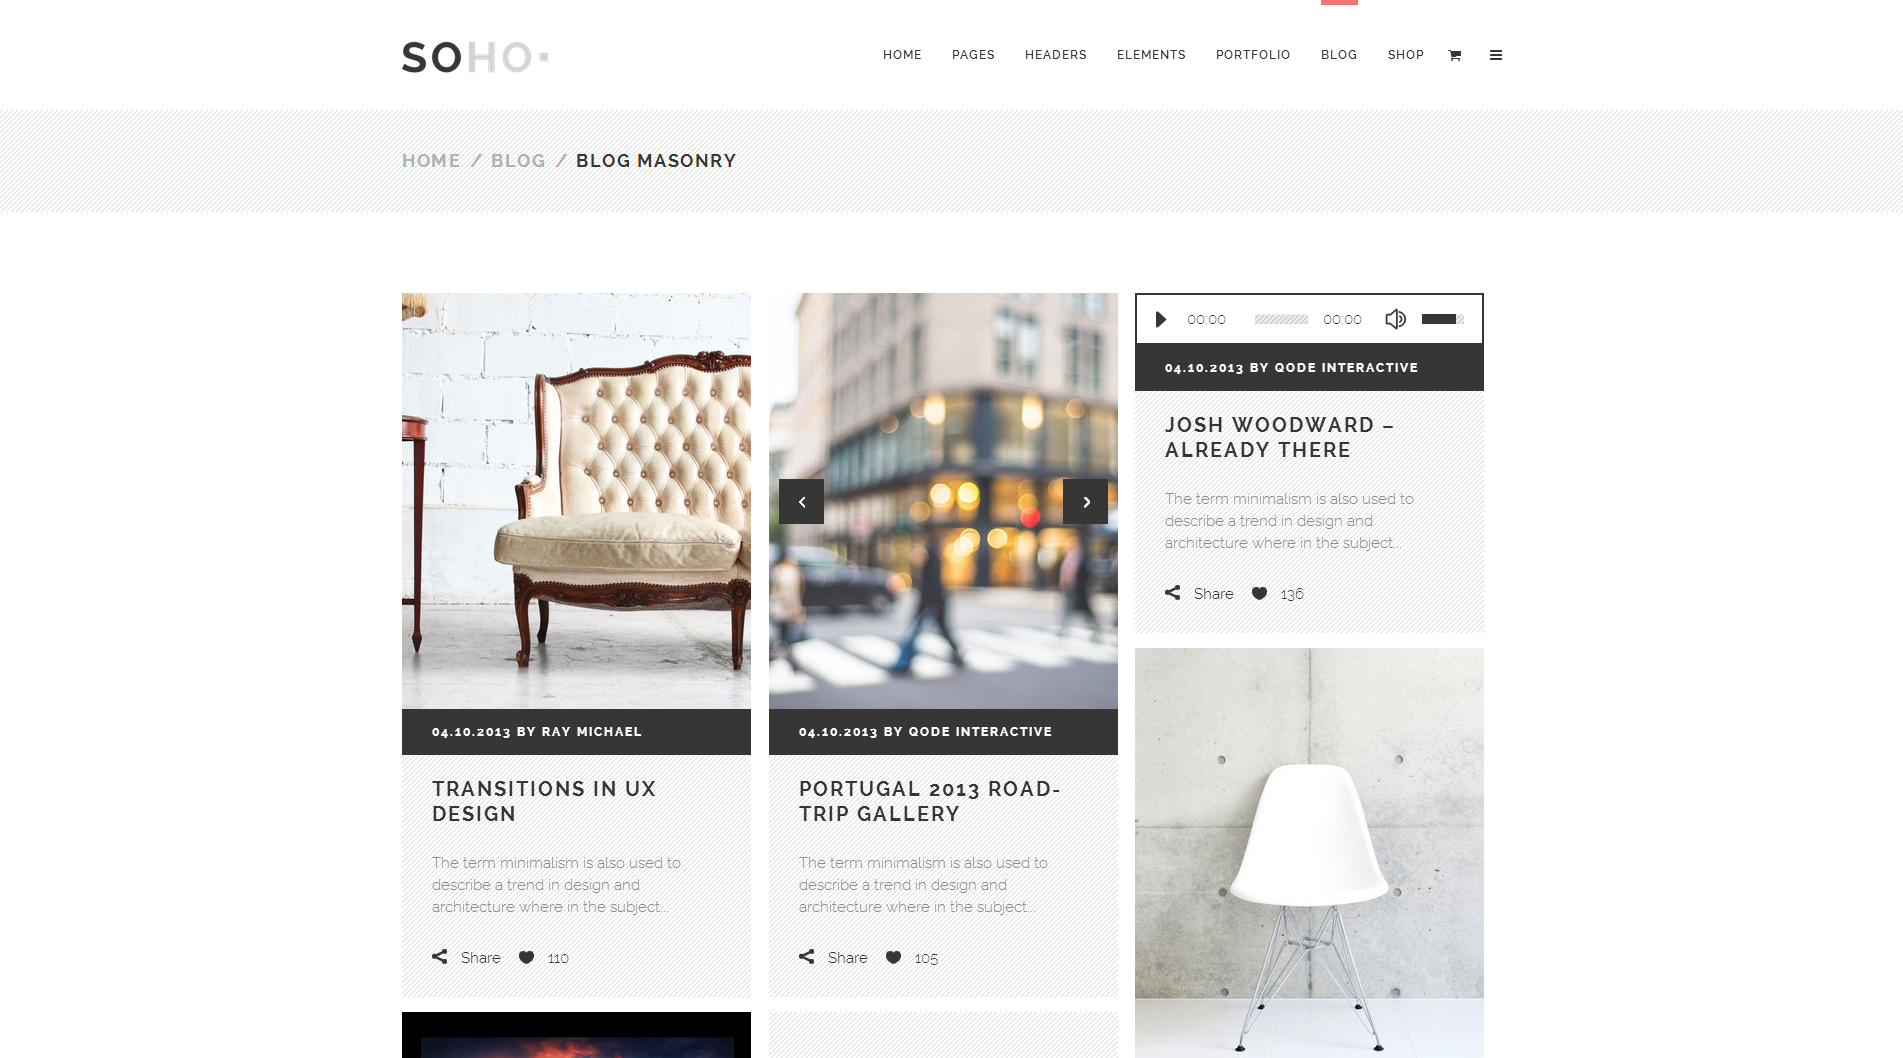
- Blog Masonry - Creates masonry layout
- Blog Masonry Fullwidth - Creates full width masonry layout
- Blog Medium Image - Displays featured image on the left side and post title and excerpt on the right
- Blog Medium Image Whole Post - Same as medium umage template but displays full post content

If desired, one of four sidebars can be turned on in the options below editor in Select Custom Fields section.
Choose sidebar to display
You can choose here custom sidebar you created. If empty, it will use Sidebar Page.
Choose blog category
You can display post of selected category
Posts per page
Enter number of posts displayed on each page
BLOG SINGLE
SOHO theme blog uses featured images as primary images displayed on the blog list page. Featured images are also used as first images in every post by default.
SOHO theme supports custom post formats. You can choose one of the following formats:
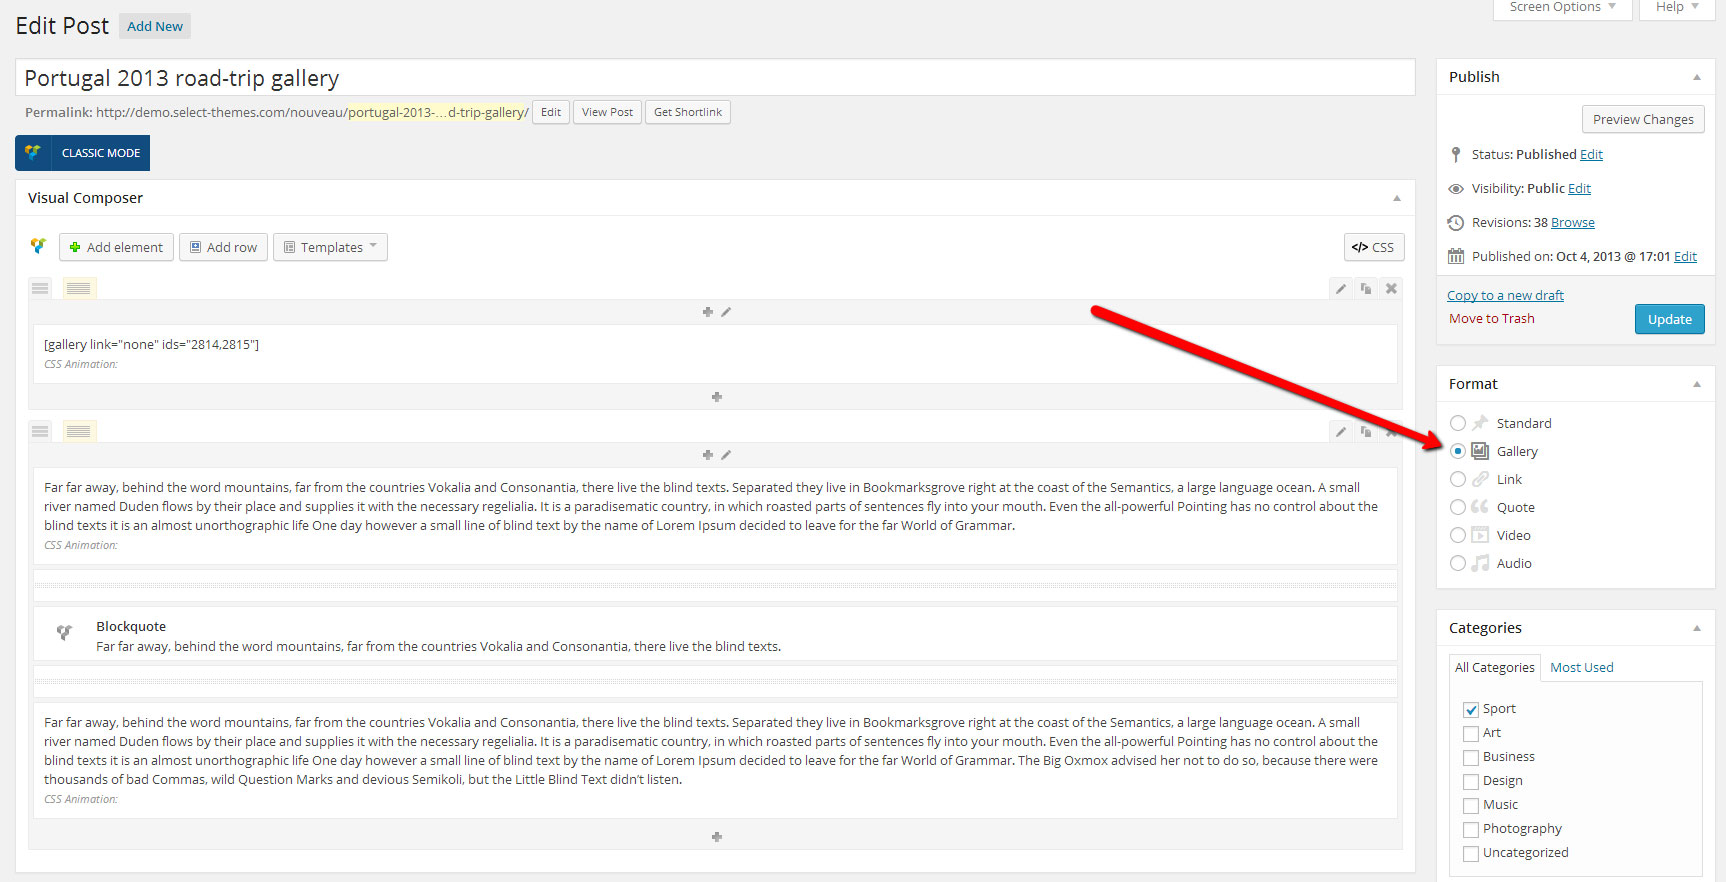
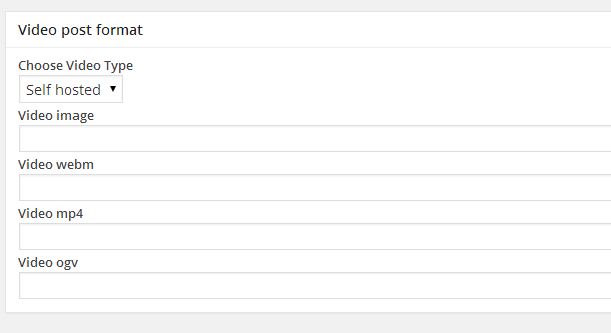
Each format creates custom fields section below editor. For example, video format creates this:

Also we implemented for Video post three different video types (Vimeo, YouTube and Self Hosted)
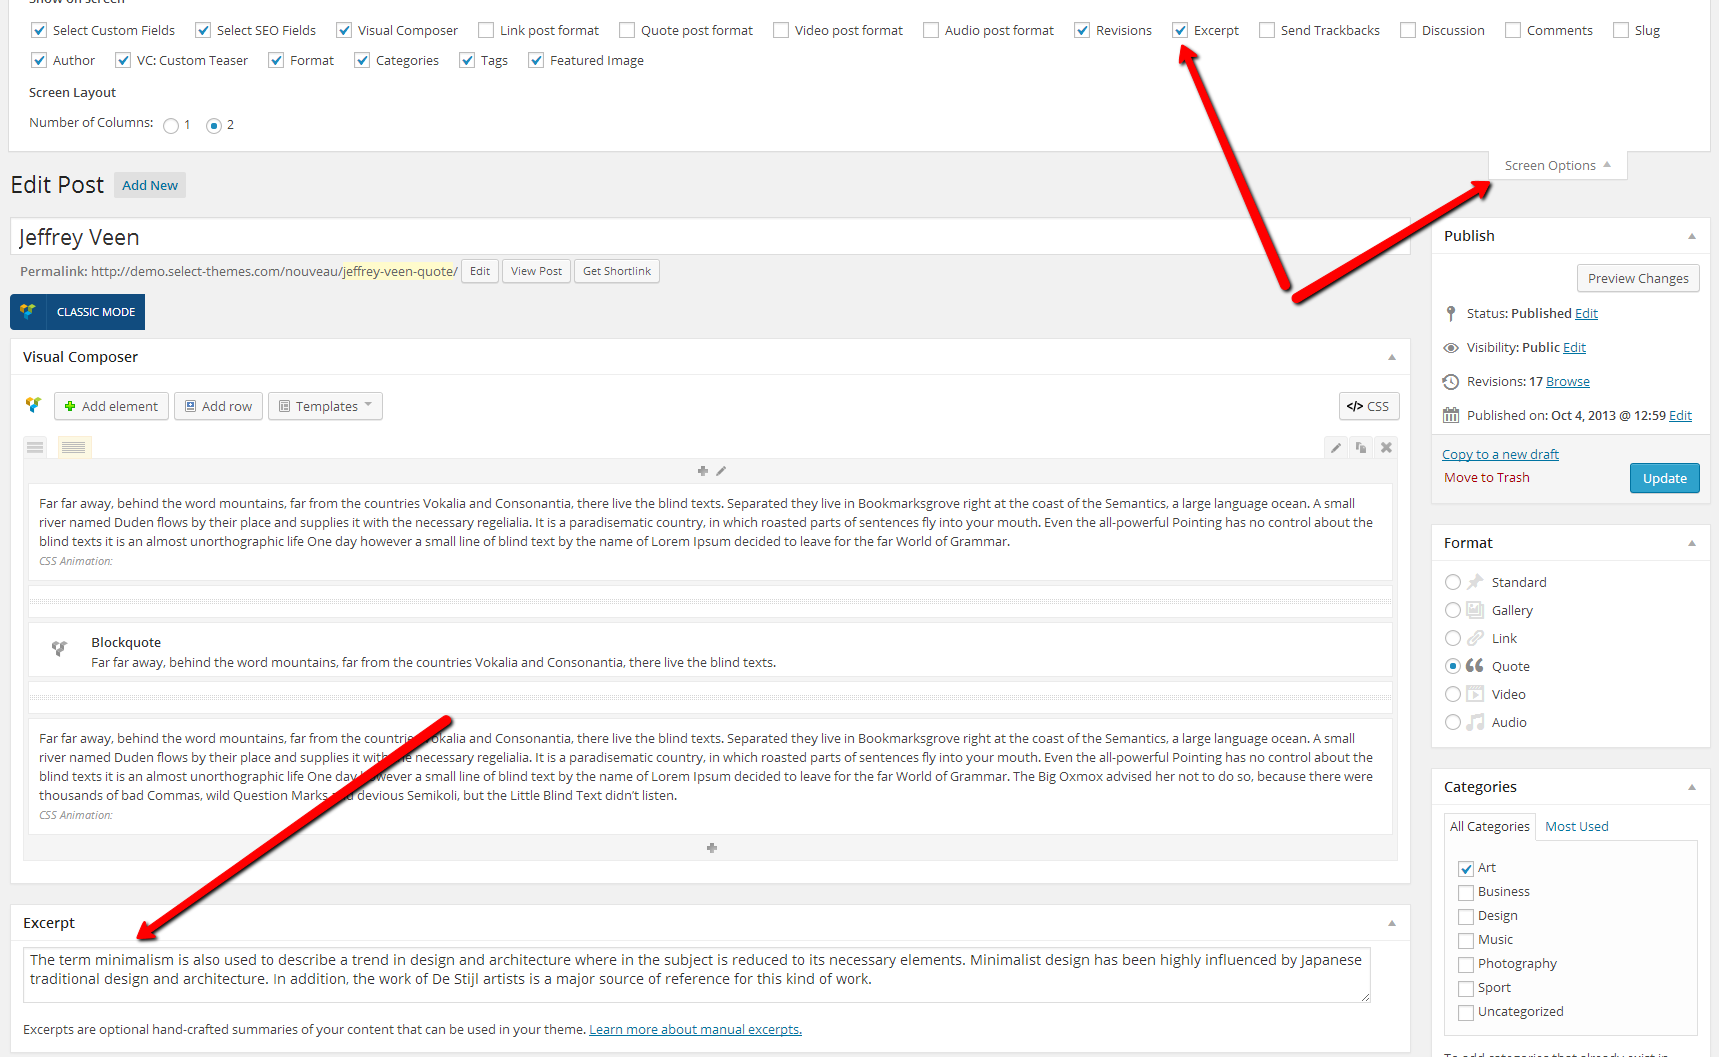
Make sure custom sections are enabled in Screen Options found in the top right corner of WP dashboard.
Similar as blog list, blog single also allows managing sidebar options in Select Custom Fields. If Choose sidebar to display field is blank, Sidebar widget area will be used.
Blog List (Template) Layout
Blog Masonry Image
Blog Masonry Fullwidth
Blog Large Image
Blog Large Image Full Width
Blog Medium Image
Blog Single Layout
Standard post
Gallery post
Video post
Audio post

Link post

Quote post
Pages
In this section we will explaid how page templates work.
Available page templates:
- Default Template
- Blog Large Image
- Blog Large Image Whole Post
- Blog Large Image Wide
- Blog Large Image Wide Whole Post
- Blog Medium Image
- Blog Medium Image Whole Post
- Blog Masonry
- Blog Masonry Full Width
- Contact Page
- Full Width
Default Template
http://demo.select-themes.com/soho/about-us/
Default Template pages are in grid.
Blog Large Image
http://demo.select-themes.com/soho/blog/blog-large-image/
Blog Large Image Whole Post
Difference between Blog Large Image Template and Blog Large Image Whole Post Template is that blog large image whole post template displays whole single post content.
Blog Large Image Full Width
http://demo.select-themes.com/soho/blog/blog-large-wide-image/
Blog Masonry
http://demo.select-themes.com/soho/blog/masonry/
Blog Masonry Full Width
http://demo.select-themes.com/soho/blog/blog-masonry-full-width/
Blog Masonry Medium Image
http://demo.select-themes.com/soho/blog/blog-medium-image/
Contact Page
http://demo.select-themes.com/soho/contact-us/
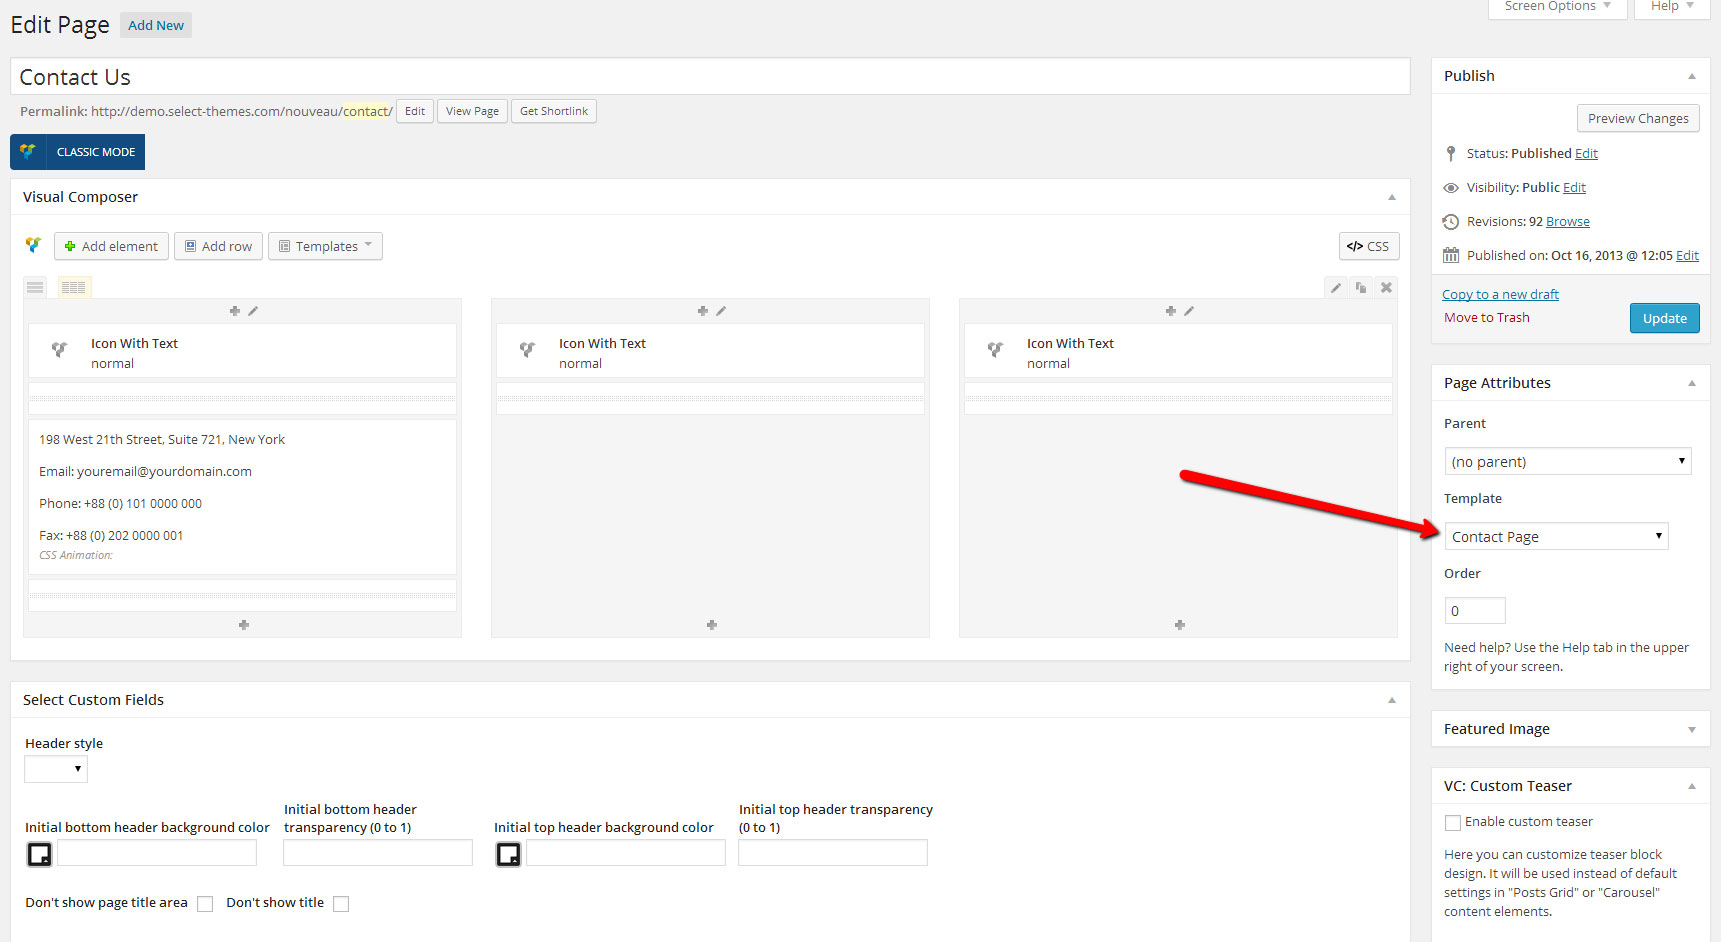
If you want to enable Google map you need to select yes and save. Then you need to go again to Contact page tab in Select options and you will see additional Google map fields.
Full Width
http://demo.select-themes.com/soho/
Default grid for Full Width template pages is full width. For this template you can combine full width sections with sections that are in grid.
Select Custom Fields
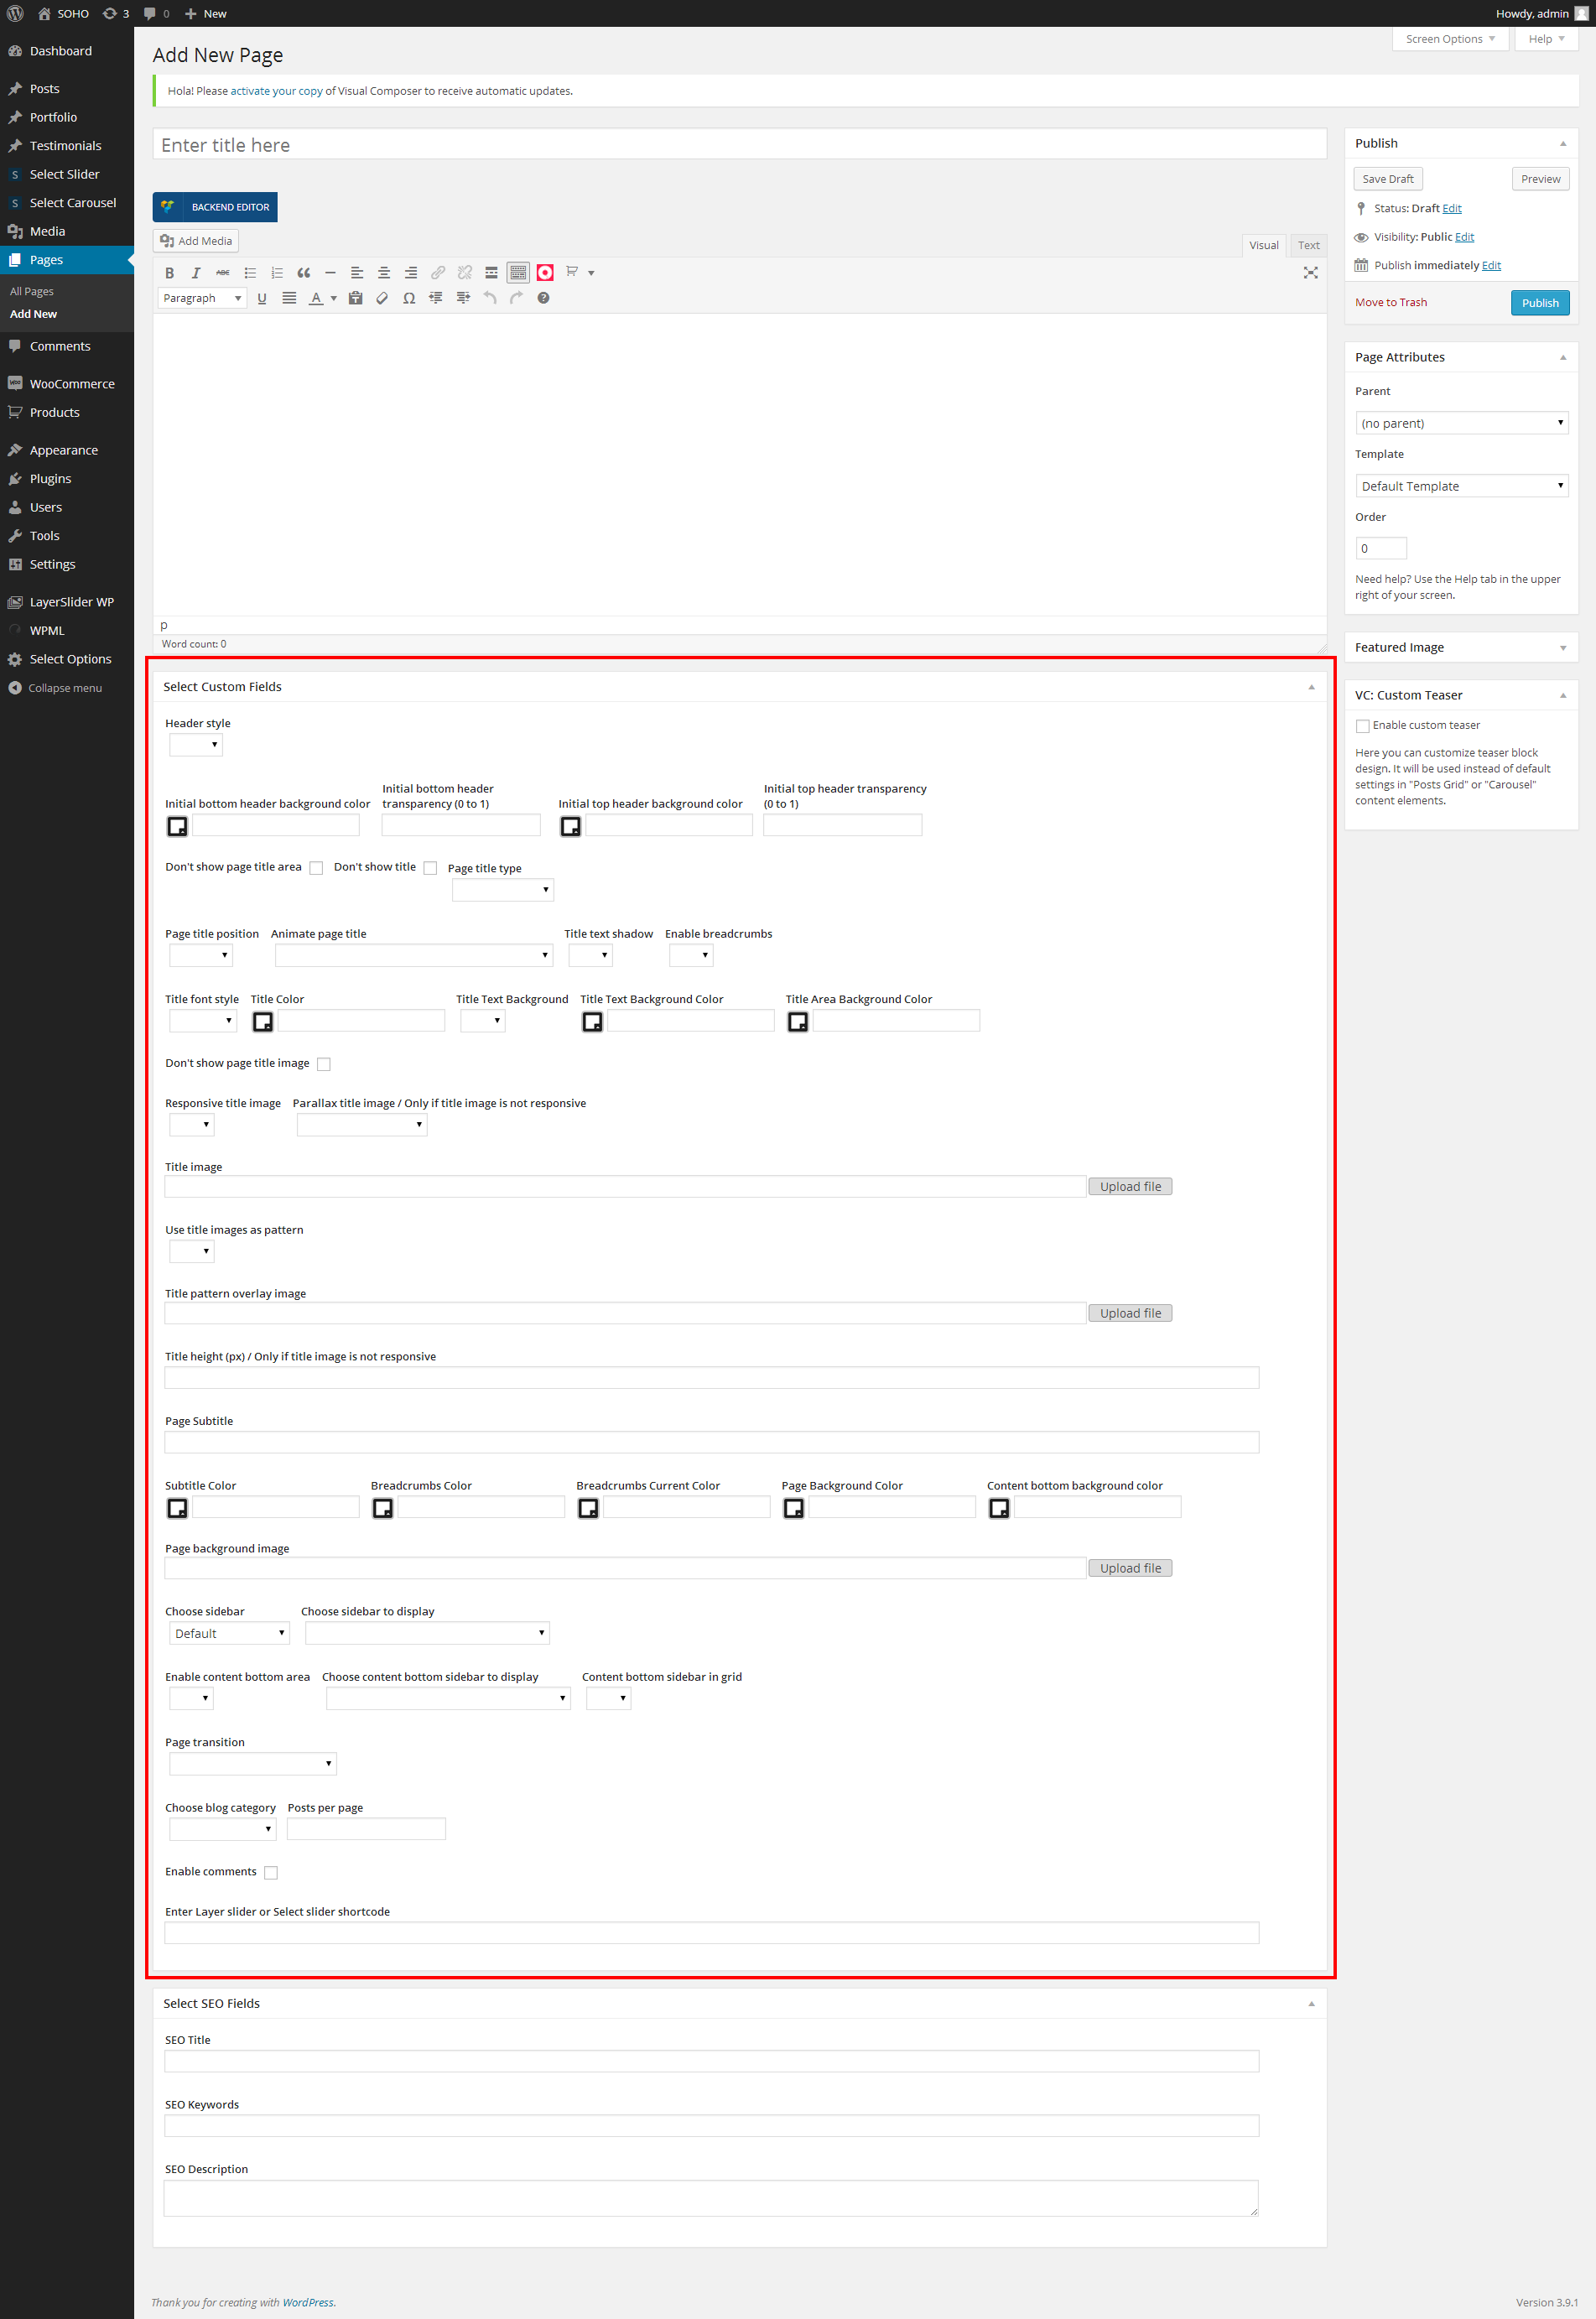
Header style - with this field you can set style for header menu for specific page. Predefined values are Dark and Light
Initial bottom header background color
Initial bottom header background color transparency (0 to 1) - Example 0.7
Initial top header background color
Initial top header background color transparency (0 to 1) - Example 0.7
Don't show page title area - check this field if you want to remove title area
Don't show title - check this field if you want to remove only title in title area
Page title type - standard or with breadcrumbs
Page title position- position for title
- Left
- Center
Animate page title
- No Animation (Default) - title is static
- Text Rigth to Left - title is entering from the left side of the page
- Fade in title text - title text fades in
- Title Area Top to Bottom - title is entering from the the top of the page
- Title Area Top To Bottom With Fade In Title Text
Title text shadow
- Yes
- No
Enable Breadcrumbs - enable or disable breadcrumbs in title
Title Font Style - choose from normal or italic font style
Title font size
- Small (18px)
- Medium (30px)
- Large (40px)
Title color
Title Text Background - choose whether to show or hide title text background box
Title Text Background Color - background color of title text box if enabled
Title Area Background Color - background color of whole title area
Don't show page title image - check this field if you want to remove title image in title area
Responsive title image
- Yes
- No
Parallax title image / Only if title image is not responsvie
- Yes
- Yes with Zoom out
- No
Title image
Use title image as pattern
Title pattern overlay image
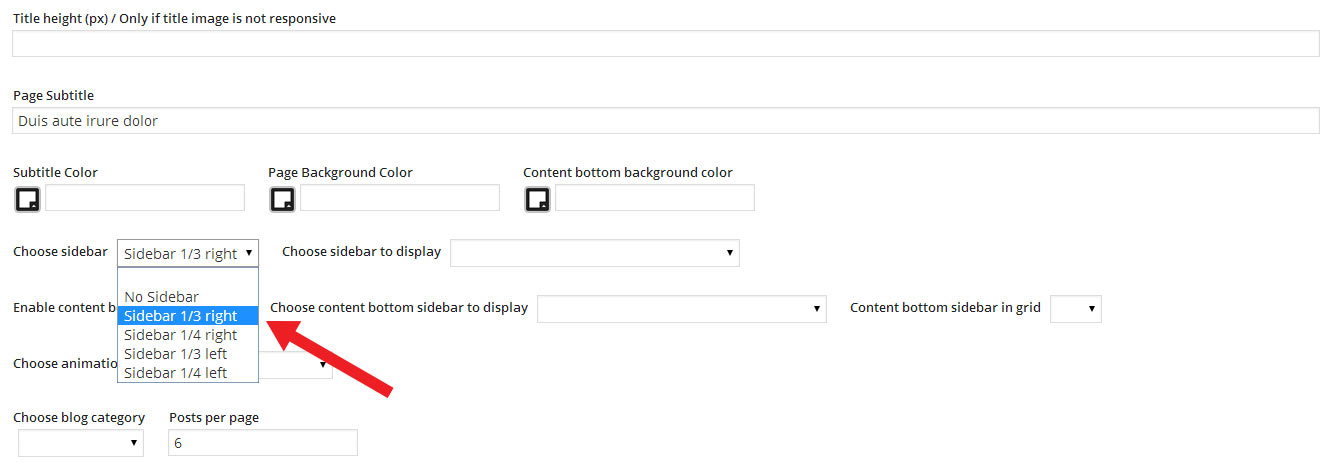
Title height (px) / Only if title image is not responsive - this is height for title area
Page subtitle
Subtitle color
Breadcrumbs Color
Breadcrumbs Current Color
Page background color
Content bottom background color
Page Background image
Choose sidebar
- No Sidebar
- Sidebar 1/3 right
- Sidebar 1/4 right
- Sidebar 1/3 left
- Sidebar 1/4 left
Choose sidebar to display - choose custom sidebar that you want to have on single post / page, you can create custom sidebar in Appearance -> Widgets -> Custom Widget Area
Enable content bottom area
- Yes
- No
Choose content bottom sidebar to display - choose custom sidebar that you want to have on this area
Content bottom sidebar in grid
- Yes
- No
Page Transition - with this field you can control page animation only for this page
- No Animation
- Up / Down
- Fade
- Left / Right
- Up - Down In / Fade Out
Choose blog category - this field is used only for Blog templates.
Posts per page - this field is used only for Blog templates.
Enable comments - Enable comment form for this page
Enter Layer slider or Select slider shortcode - in this field you can paste layer slider or select slider shortcode. Container for this area is full width.
Portfolio
Portfolio is created as custom post type and can be found in the left WordPress menu.
Adding Portfolio items is the same as creating blog posts. Featured image is used for portfolio lists.
You can choose between 7 different layouts listed in Choose portfolio single view field.
Portfolio images are added through “Portfolio Images” link below editor.
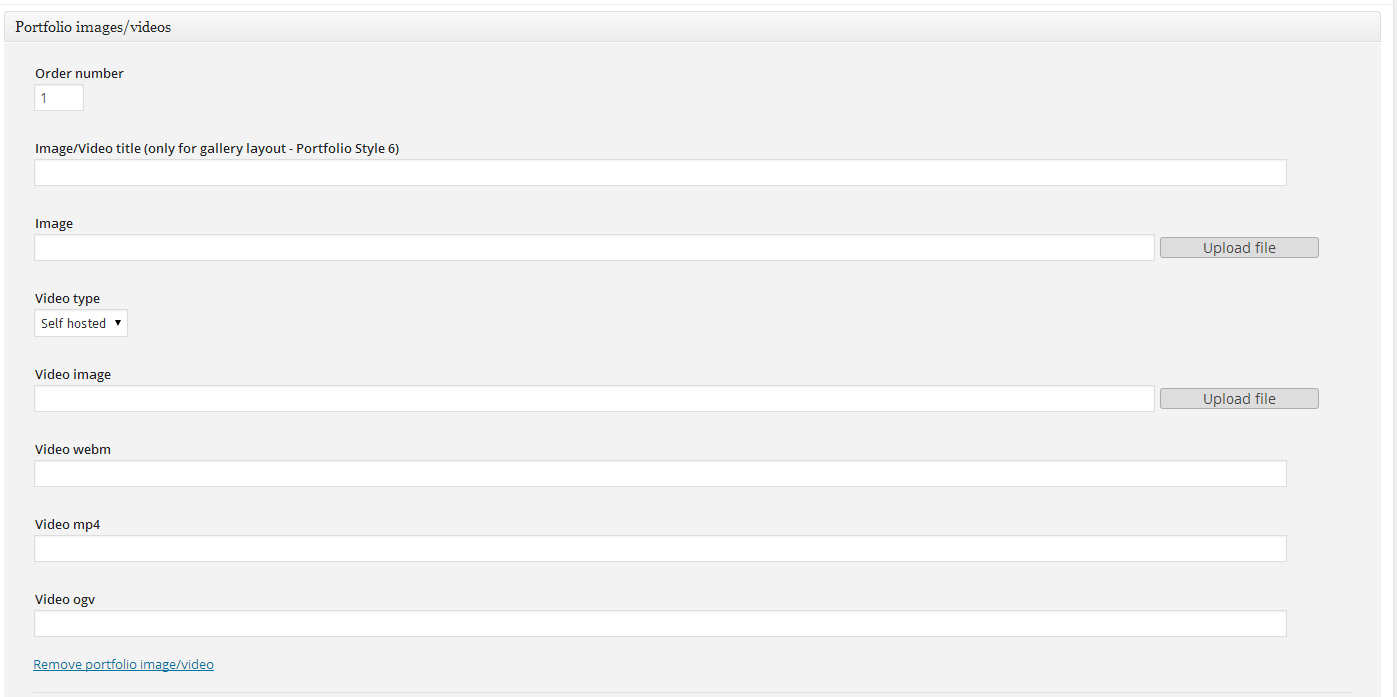
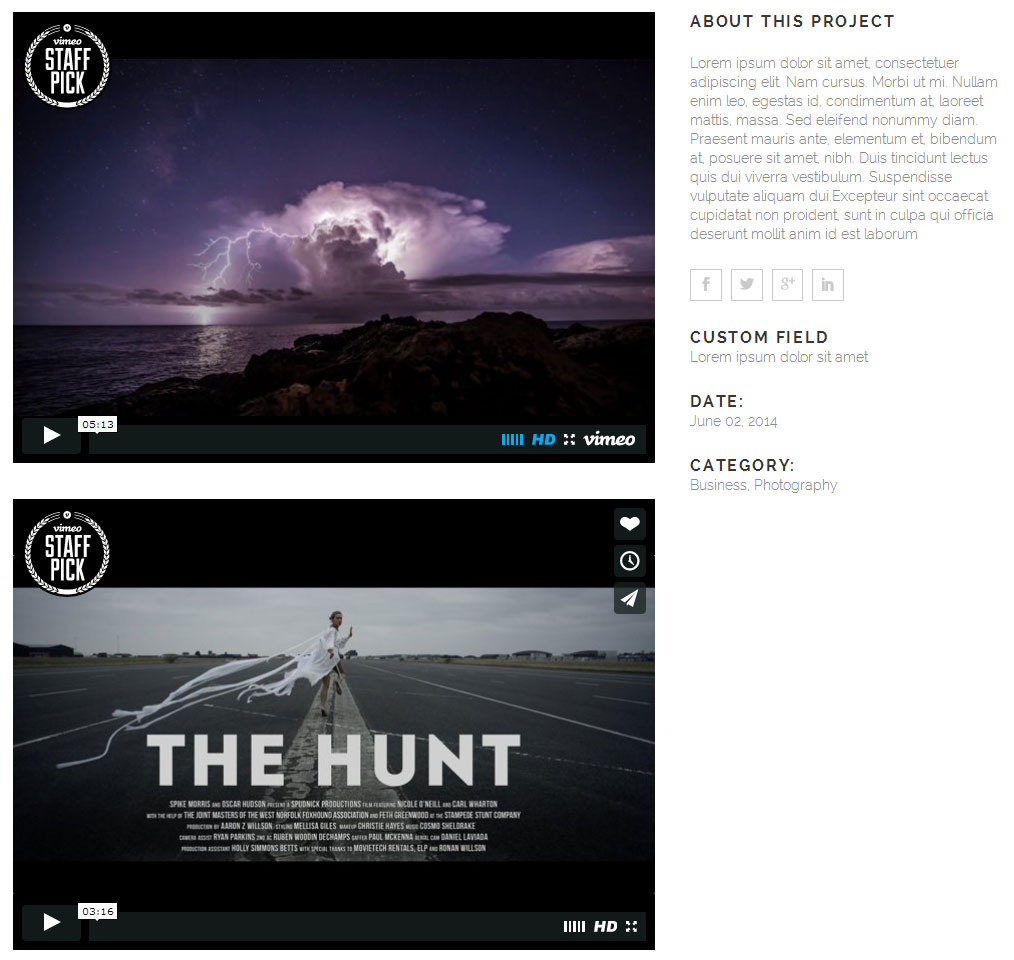
Also our theme allows adding videos together with images. Please not that when adding new Portfolio image/video item, if you want video to display, you should leave image field empty. In the Video field if you've choose Vimeo or Youtube you should just paste video ID. If you choose self hosted video you should select video from media library that you want to be displayed on your portfolio page.
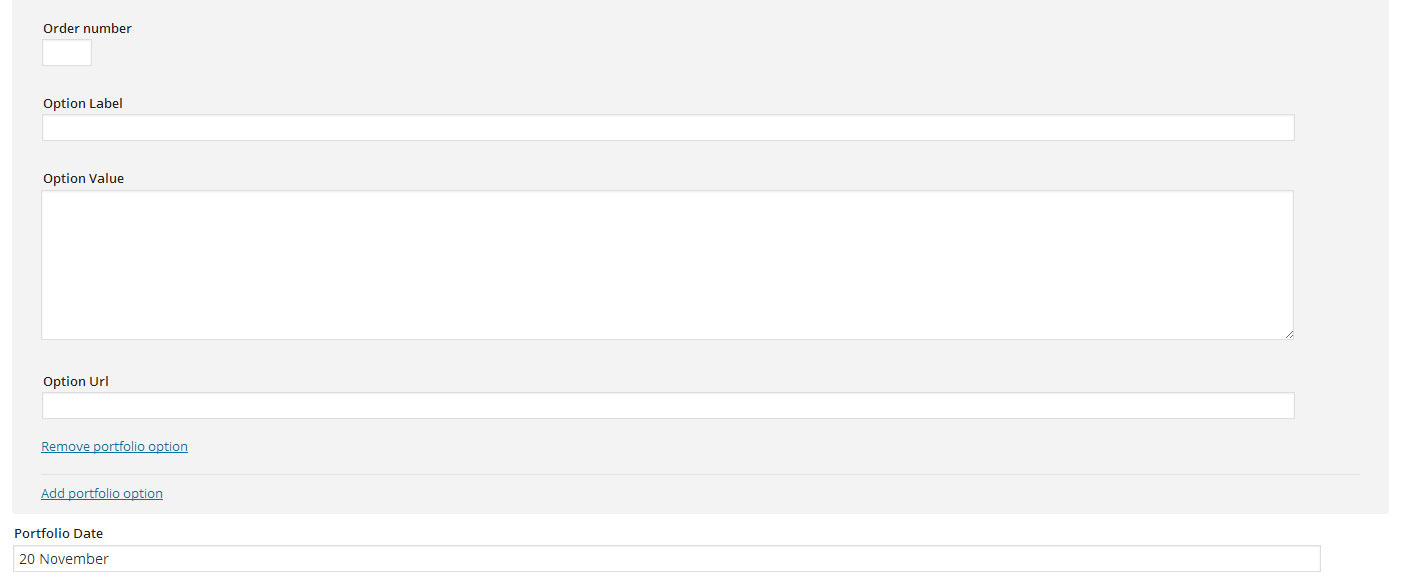
Create custom label name (e.g. Project URL) using the “Option Items”.
PORTFOLIO LIST
Portfolio list can be added from Visual Composer by adding Portfolio element found in By Select section of the Add New Element window. Portfolio list has following properties:
- Type - used to define layout of the list (Standard, Gallery and Gallery Without Spaces)
- Columns - choose number of columns in the row
- Image Size (portrait, square)
- Order by & Order - set how items are ordered
- Filter - set if filter is displayed
- Hover (choose from two hover types)
- Choose Link Type: Single Project Link and Disable Link
- Show Load More - set if Load More button is enabled
- Number - set number of items displayed on first load (-1 is all)
- Category - enter category slug if you want to list items from selected category. Note that filter will be generated from sub-categories of selected category
- Selected Project - list selected project IDs delimited by comma
- Title Tag - set how title tag should be rendered
Standard
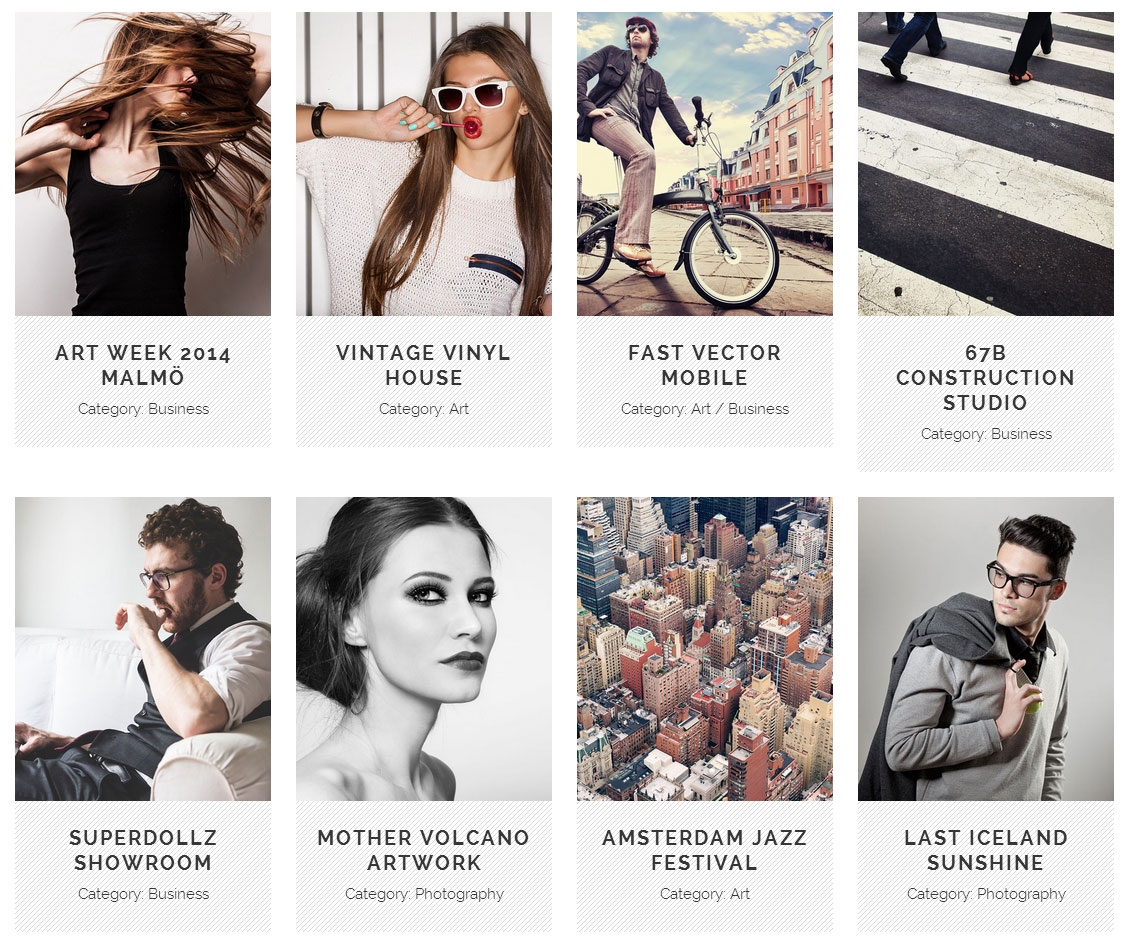
Gallery With Space
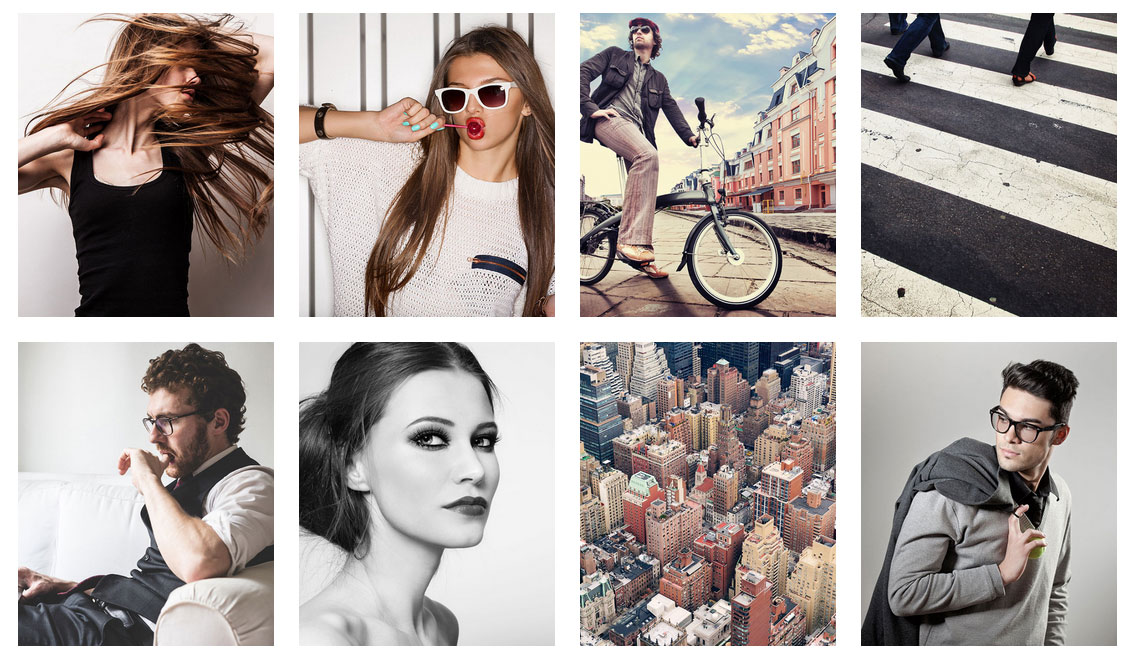
Gallery Without Spaces
Portfolio Single Layout - You can choose these layouts in Portfolio single page in Select Custom fields -> Choose portfolio single view
Portfolio Single - Full Width Project
Portfolio Single - Small Project
Portfolio Single - Big Slider
Portfolio Single - Small Slider
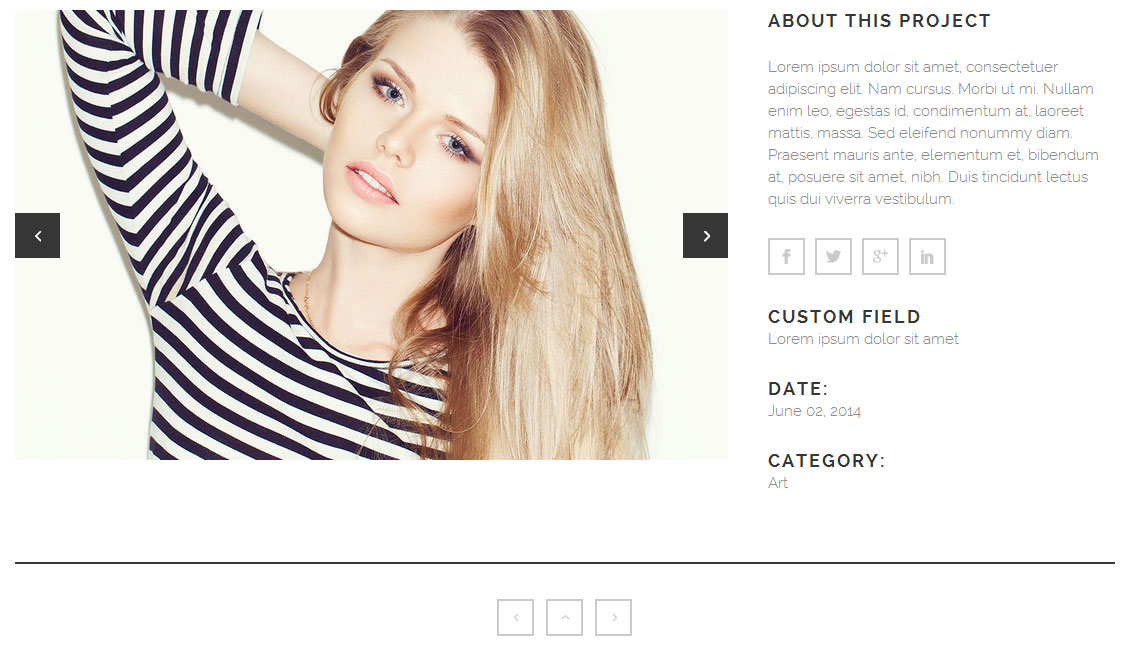
Portfolio Single - Gallery
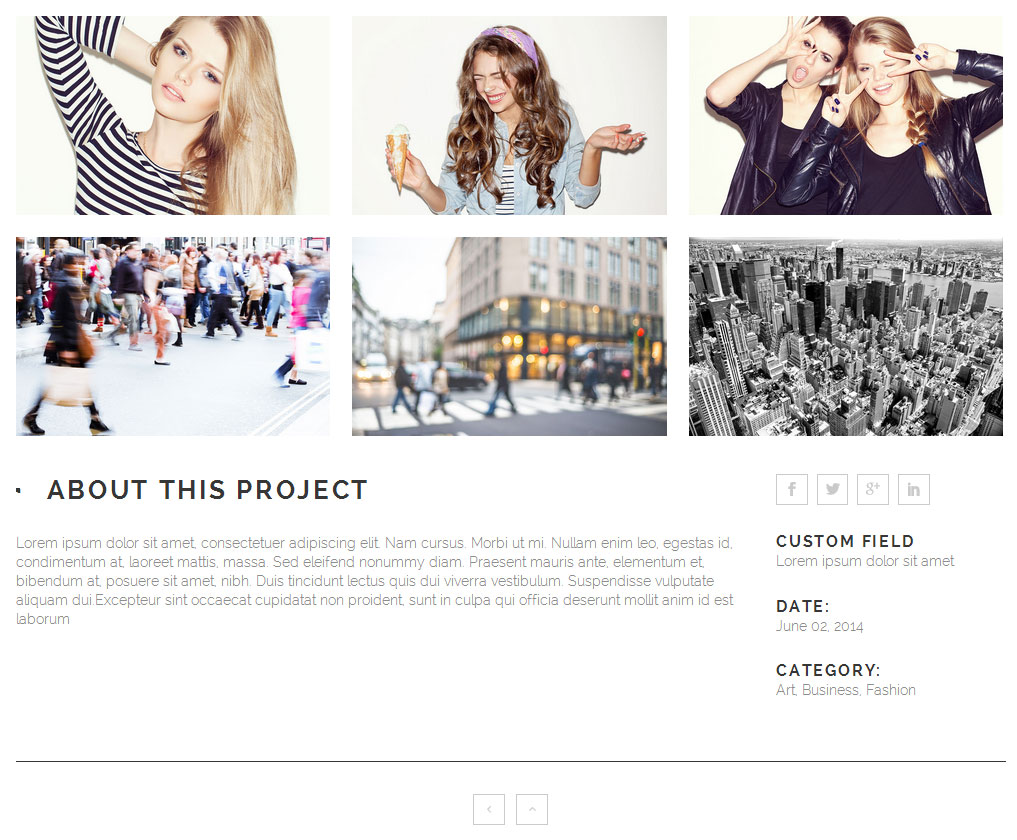
Portfolio Single - Custom (Full Width Custom and Grid)
Testimonials
Testimonials is created as custom post type and can be found in main WordPress menu on the left side of the screen.
When editing single testimonial, you need to enter following information:
- Author name
- Text - this is testimonial's content
- Company Position - for example General Manager
- Website
TESTIMONIAL LIST
Testimonial list can be added from Visual Composer by adding Testimonials element found in By Select section of the Add New Element window. Also you have two type of testimonials shortcode: Simple and Standard.
Visual Composer
Soho Theme comes with awesome Visual Composer plugin. Its documentation is included with our documentation.
You can find our elements (shortcodes) added to it in the By Select section of New Element wizard.
Please note that our shortcodes have custom attributes.
Some of existing Visual Composer elements are updated with our custom properties. For example Row shortcode has following important custom attributes:
- Row is container element to which you can add other elements (shortcodes). This element can be full width or in grid and you can set for example this parameters: CSS Animation, Transition Delay, Anchor ID and Text Align. With CSS Animation you can set entering animation for this element and with Transition Delay you can set delay for chosen CSS Animation. Anchor ID is used in our anchor functionality. You can add row ID which can be referenced in main menu Anchor ID field. In this shortcode you can add other shortcode like you want.
- Anchor ID - explained in the Menu section of this documentation
Select Slider
- Slides
- Add New Slide
- Sliders
In "Slides" section you can see all slides that you created.
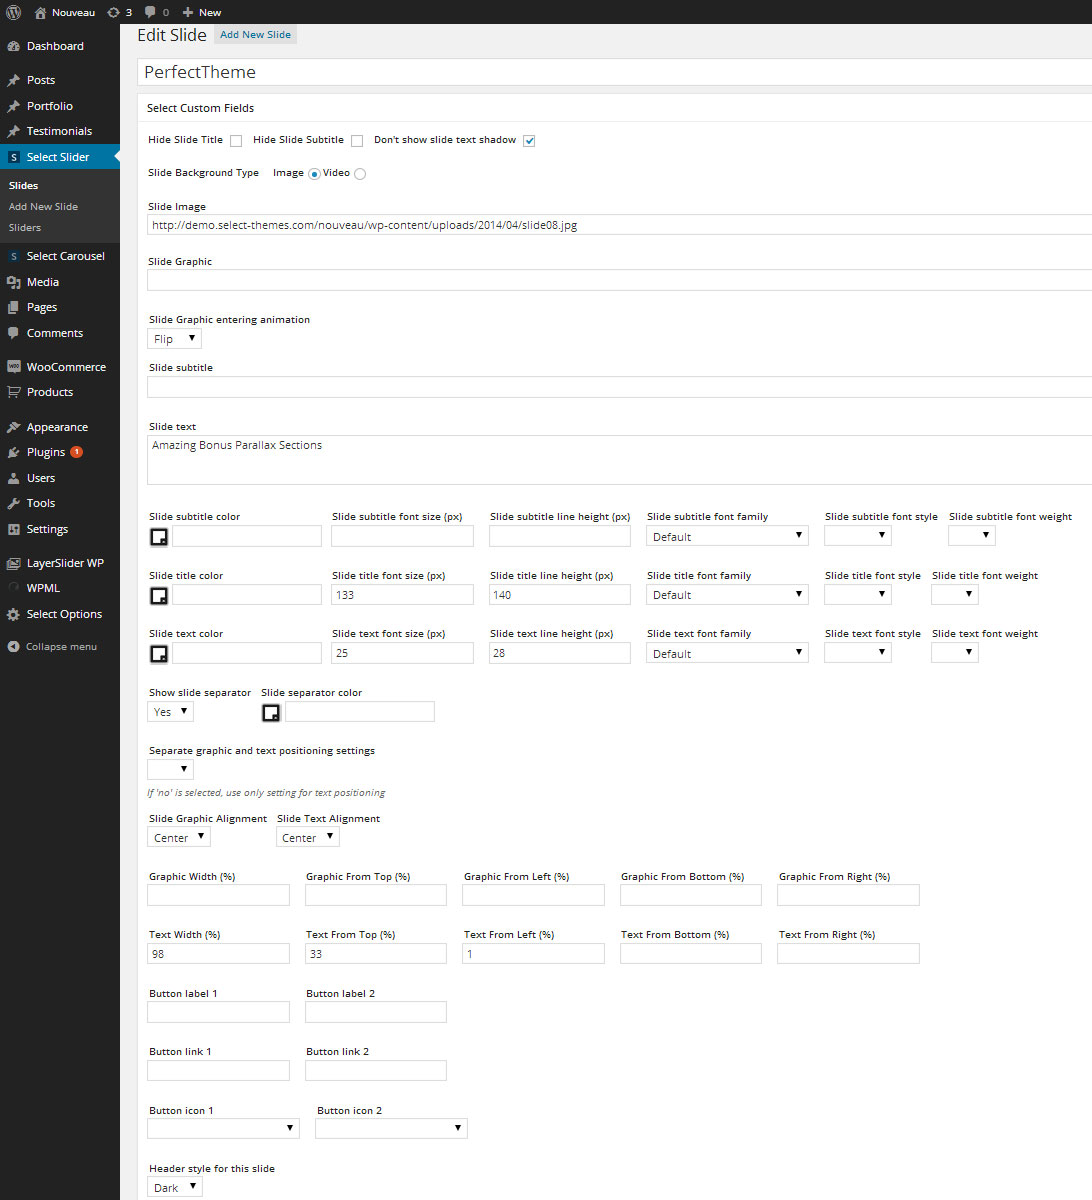
Add New Slide - Click here to add your first slide. First you need to upload some image for your slide background. Find Slide Image field and upload your image.
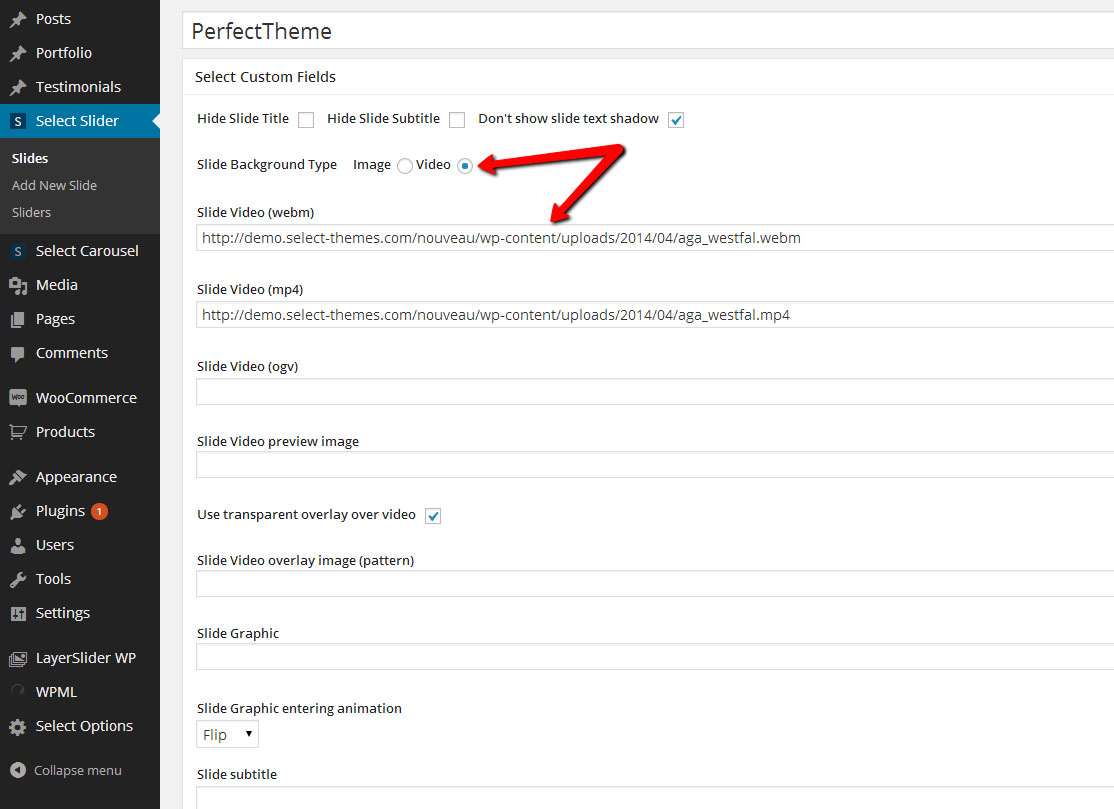
In order to use video background instead of slide image, you need to select Video Background type and to make sure you entered correct path for 3 types of video: webm, mp4 and ogv. You can also enter path for preview image and set if you want to have transparent overlay over video.
- Hide Slide Title
- Hide Slide Subtitle
- Don't Show Slide Text Shadow
- Slide Background Type - Image or Video
- Slide Image
- Slide Graphic
- Slide Graphic Entering Animation - Flip or Fade
- Slide Subtitle
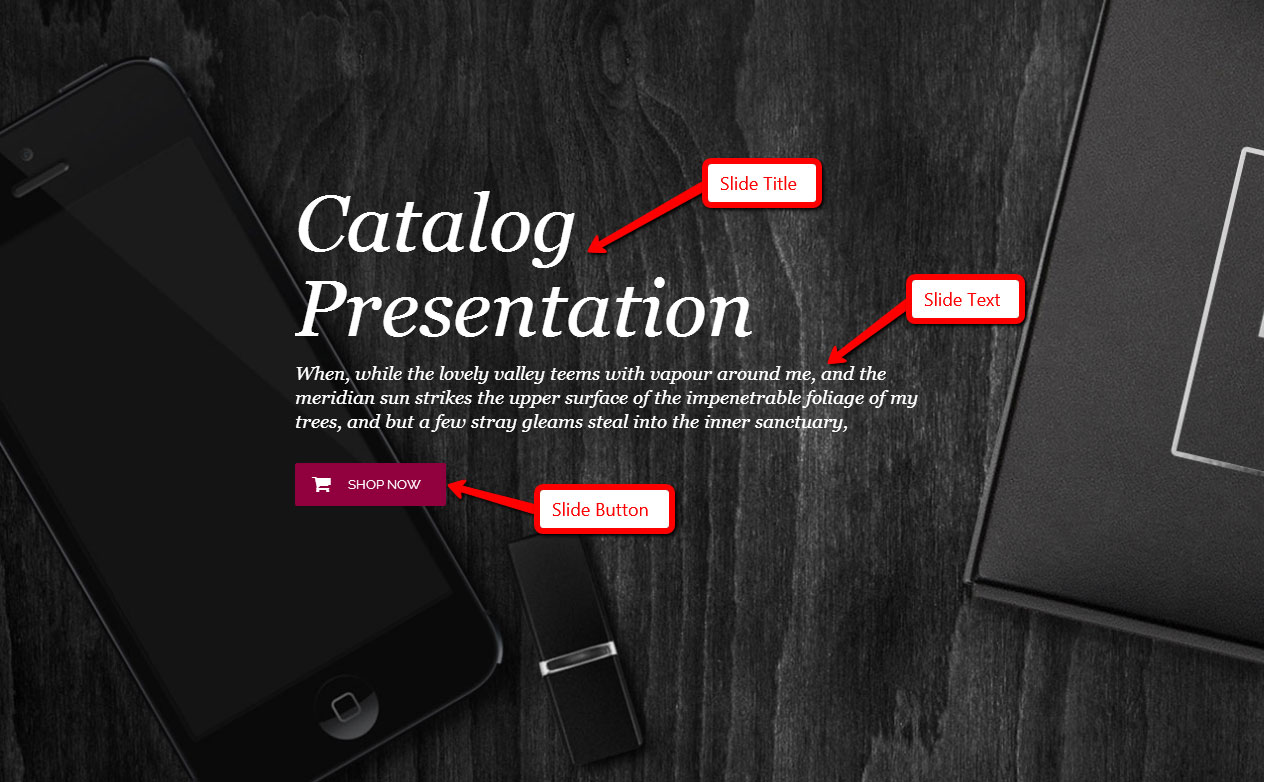
- Slide Text
- Styles for Slide Title, Subtitle and Text - Color, Font Size, Line Height, Font Family, Font Style and Font Weight
- Slide Separator Color
- Button Label and Link
Hide Slide Title - To hide slide title
Slide Background Type - Choose between video background and image
Slide Graphic Entering Animation - Choose between flip and fade effect
Additional slide options:
- Separate graphic and text positioning setting
- Slide Content Alignment
- Slide Text Alignment
- Content Width
- Content From Top
- Content From Bottom
- Content From Left
- Content From Right
- Header style for this slide
- Slide navigation color
Slide Content Alignment - With this field you can control alignment of slide's content
Slide Text Alignment - With this field you can control alignment of slide's content text
Content Width - With this field you can set content's width in percentages
Content From Top, Bottom, Left and Right - With this fields you can control position of slide's content
Header style for this style - With this field you can control header style for slide, default value is determined by global header settings. You have two predefined header style available (dark / light).
Slide navigation color - With this field you can control color style for Select Slider navigations
Sliders
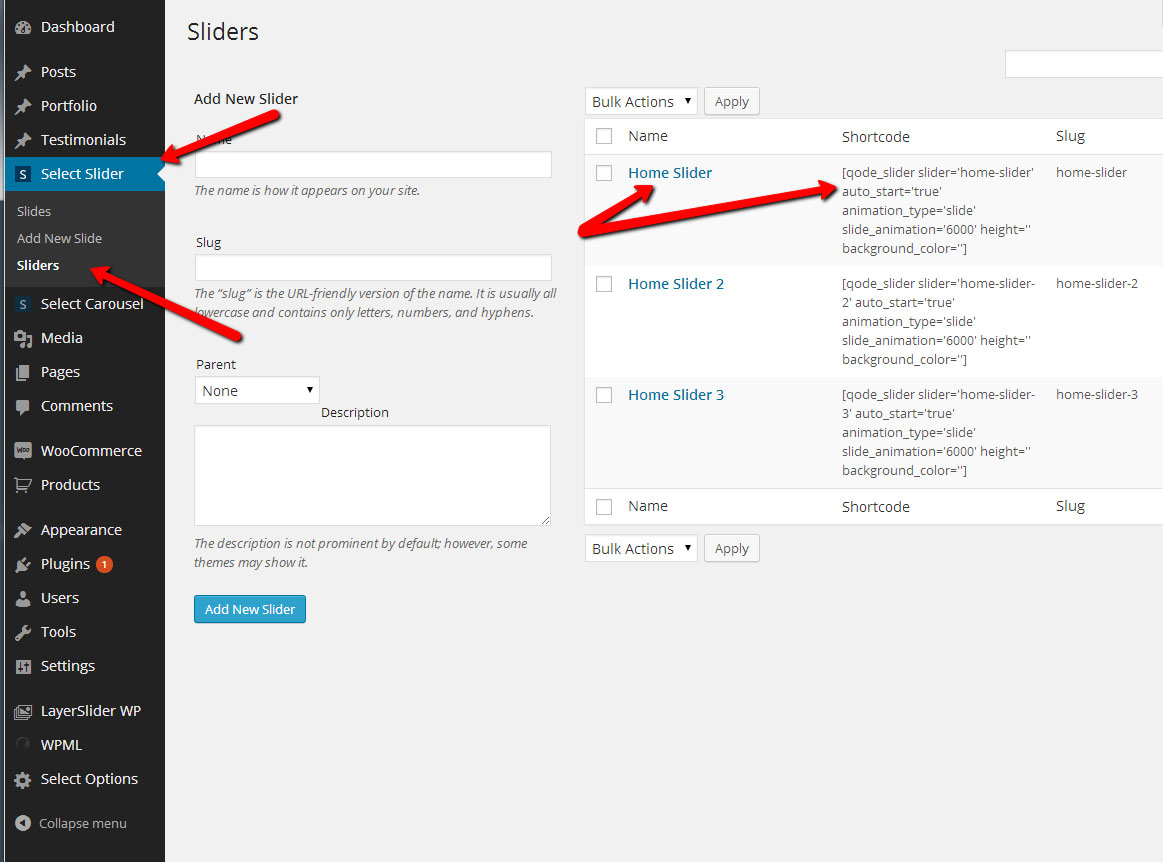
In this section you can create new sliders. Necessary fields are Name and Slug. When you created new slider it will appear in table on the right part of the screen with Shortcode data generated and ready for usage.
For example, this shortcode string is generated for About Us Slider.
[qode_slider slider='home-slider' auto_start='true' animation_type='slide' slide_animation='6000' height='' background_color='']
Two additional fields for each slider
- Effect on header (dark/light style) - With this option you can disable changing of header style dark / light (default value is no)
- Show prev/next thumb - With this option you can enable preview thumbnails of prev / next slide (default value is no)
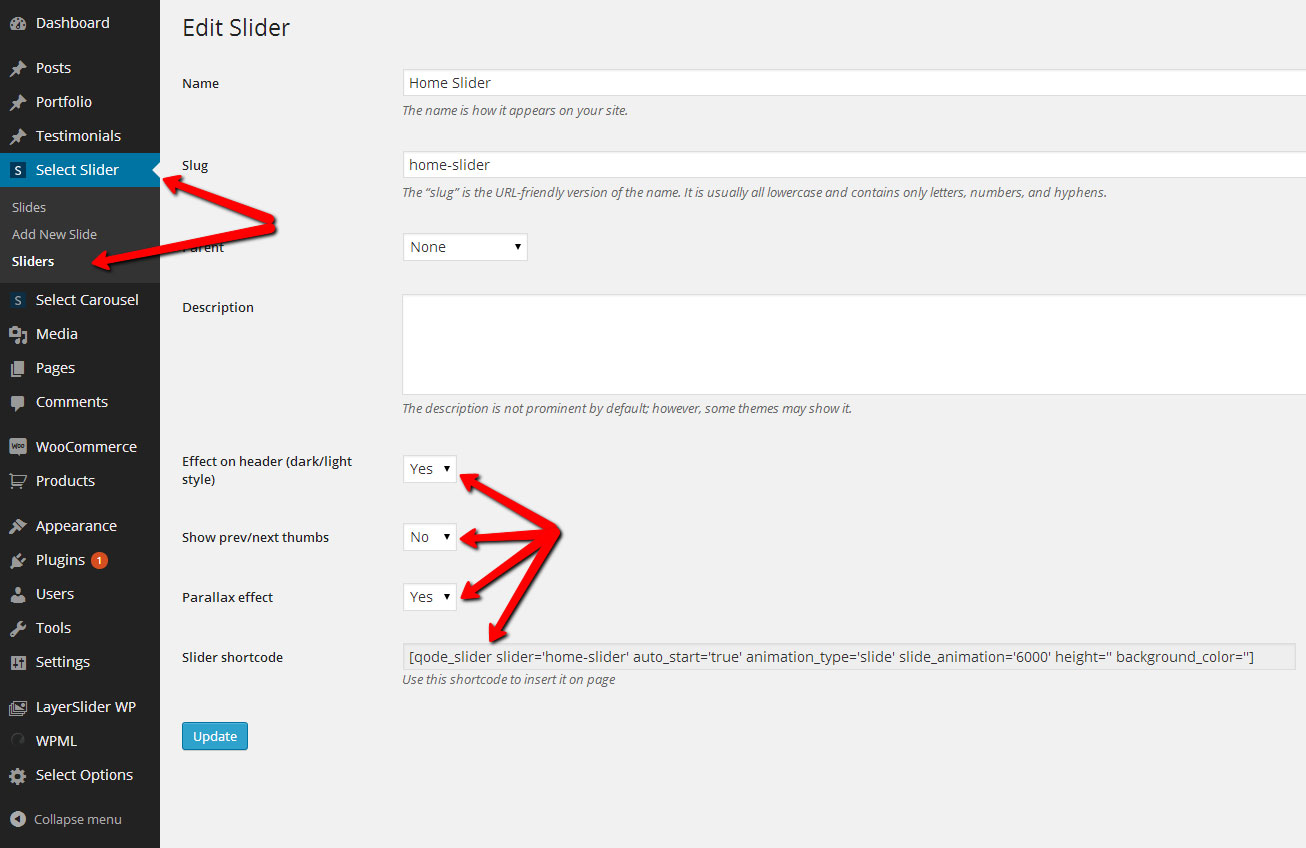
Here is the explanation of shortcode attributes:
- slider - this is slider's slug
- auto_start - controls whether slide animation starts automatically (default value is true)
- animation type - choose one of two predefined animation types. Accepted values are 'slide' and 'fade'
- slide_animation - duration of slides animations in ms (default value is 6000ms)
- height - slide's height in px (if you don't set anything slider will be FULL SCREEN)
- responsive_height - if 'yes' is entered slider's height will be responsive. Works only if height is set
- background_color - slide's background color
Example of About Us Slider usage:
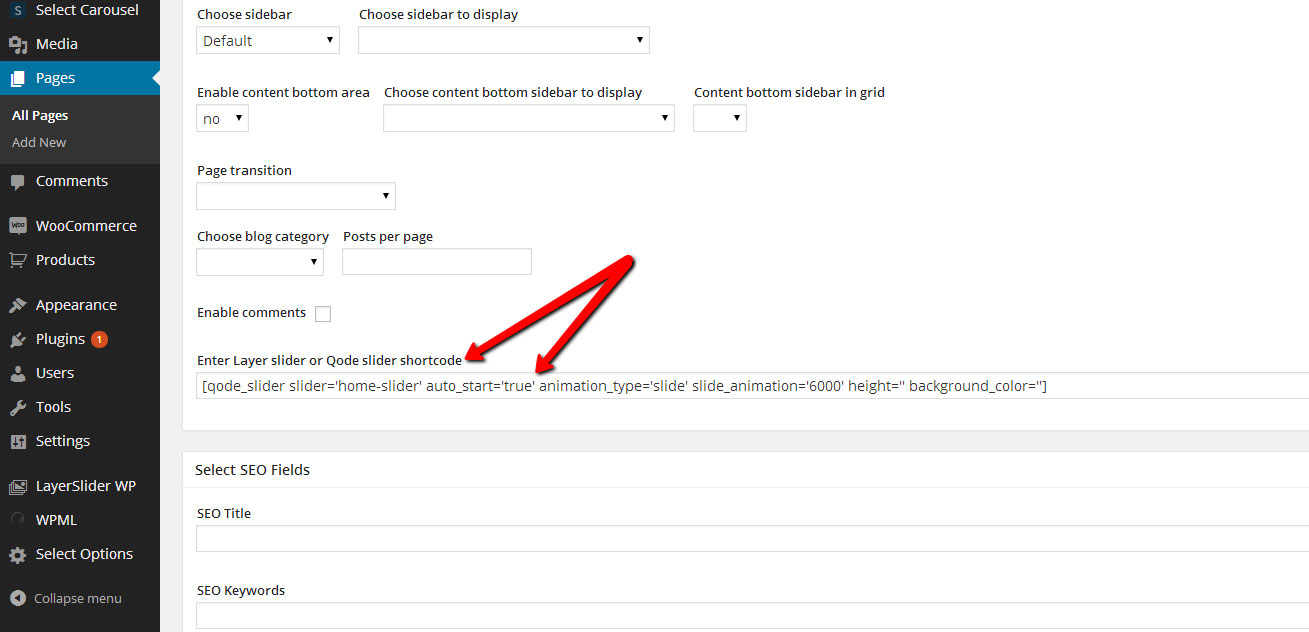
In order to use created slider you just need to copy/paste generated shortcode string from Sliders section to the some page's Enter Layer slider or Select slider shortcode field in Select Custom fields section.
Custom Shortcodes
Here is the list of Visual Composer custom shortcodes coming with our theme
- Accordion
- Facebook Like
- Google+ Button
- Google Maps
- Image Gallery
- Row
- Separator
- Separator With Text
- Single Image
- Tabs
- Tweetmeme Button
- Video Player
Accordion
- Style: Accordion, Toggle, Accordion with Icon and Toggle with Icon
- Icon Pack: choose from Font Awesome icons or Elegant Icons
- Icon
- Icon Color
- Title: Title label for accordion section heading
- Title Color
- Background Color
- Border Color
- Background Color
- Title Tag: h2, h3, h4, h5 and h6
Accordion and Toogle
Accordion and Toggle With Icon
Image Gallery - Flexslider
Image Gallery - List

Image Gallery - Grayscale list

Image Gallery - Frame slider
Row
- Row Type: Row, Parallax, Expandable, Expandable With Background and Content Menu
- Type (Only When Row Type is Row): In Grid and Full Width
- Anchor ID
- Row in Content Menu: Yes/No
- Content Menu Title
- Content Menu Icon Pack - choose from Font Awesome and Elegant Icons
- Content Menu Icon: Font Awesome icons list (Font Awesome Icons)
- Text Align: Left, Right and Center
- Video Background (Only When Row Type is Row)
- Video Overlay
- Video Overlay Image (pattern)
- Video Background webm file
- Video Background mp4 file
- Video Background ogv file
- Video Preview Image
- Background Image (Only When Row Types are Row or Parallax)
- Pattern Background (Only When Row Types are Row, Parallax or Expandable with Background)
- Section Height (Only When Row Type is Parallax)
- Parallax Speed (Only When Row Type is Parallax)
- Background Color (Only When Row Types are Row, Parallax or Expandable)
- Border Bottom Color (Only When Row Types are Row or Expandable)
- Padding (Only When Row Type is Row and Type is Full Width)
- Padding Top (Only When Row Type is Row)
- Padding Bottom (Only When Row Type is Row)
- Background Hover Color (Only When Row Type is Expandable)
- Background Overlay Color (Only When Row Type is Expandable with Background)
- Background Overlay Hover/Active Color (Only When Row Type is Expandable with Background)
- Label Color (Only When Row Type is Expandable and Expandable with Background)
- Label Hover Color (Only When Row Type is Expandable and Expandable with Background)
- More Label (Only When Row Type is Expandable and Expandable with Background)
- Less Label (Only When Row Type is Expandable and Expandable with Background)
- Label Position (Only When Row Type is Expandable): Left, Right and Center
- Color (Only When Row Type is Expandable)
- CSS Animation (Row - Row Type): Elements Shows From Left Side, Elements Shows From Right Side, Elements Shows From Top Side, Elements Shows From Bottom Side, Elements Shows From Fade
- Transition Delay (Row - Row Type)
Row is container element to which you can add other elements (shortcodes). This element is can be full width or in grid. With CSS Animation you can set entering animation for this element and with Transition Delay you can set delay for chosen CSS Animation. Anchor ID is used in our anchor functionality. You can add row ID which can be referenced in main menu Anchor ID field.
Expandable is full width container element which is initially closed. This element has two buttons which open / close this section when clicked. You can add every shortcode to this container element.
Content Menu is menu built from page sections and allows creation of one page web sites. First you need to add few row shortcodes to your home page (each row is menu item in section menu), then you need to edit each row: just click edit row and select Use row for content menu? and fill section Title and Icon if you want. Also you need to set anchor link for each row, so when you click on content menu item page will be scrolled to that specific section. Then add one row shortcode where you want to be your content menu, edit this row and select type content menu and save.
Parallax is our simple and easy plugin for creating image parallax effects when scrolling the page.
Separator
- Type: Normal, Transparent and Small with Icon
- Separator Width (%)
- Position: Left, Right and Center
- Icon (Only for Small with Icon type): Font Awesome icons or Elegant Icon list
- Separator Color
- Thickness: Separator height
- Top Margin
- Bottom Margin

Separator With Text
- Title
- Title Position: Align Left, Align Right and Align Center
- Title Color
- Title Background Color
- Border: Yes / No
- Background Color
Tabs
- Style: Horizontal Full Width, Horizontal Standard and Vertical Left
- Title
- Tab Color
- Tab Background Color
- Tab Border Color
Horizontal Tabs
Boxed Tabs
Video Player
- Video Link (url)
Here is the list of custom shortcodes added to Visual Composer with our theme
- Blockquotes
- Button
- Call To Action
- Columns
- Counter
- Cover Boxes
- Custom Font
- Dropcaps
- Highlight
- Icon
- Icon List Item
- Icon With Text
- Image Hover
- Image With Text Over
- Latest Posts
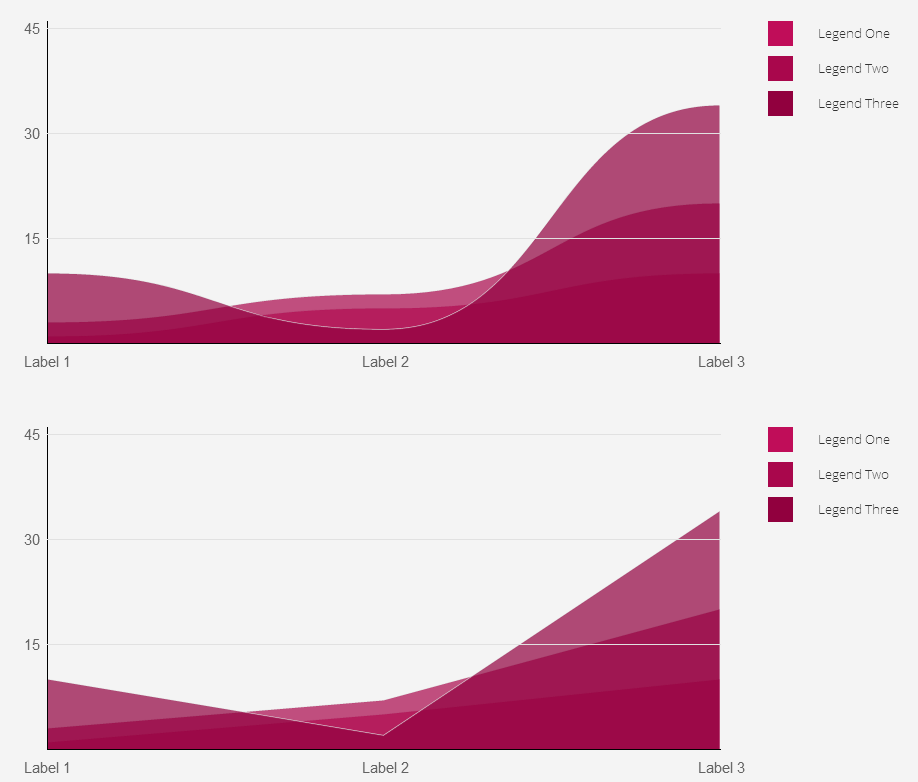
- Line Graph
- List - Ordered
- List - Unordered
- Message
- Pie Chart
- Pie Chart With Icon
- Pie Chart 2 (Pie)
- Pie Chart 3 (Doughnut)
- Portfolio List
- Portfolio Slider
- Pricing Table
- Process
- Progress Bar - Horizontal
- Progress Bar - Vertical
- Progress Bar - Icon
- Select Carousels
- Select Clients
- Social Icons
- Social Share
- Team
- Team Simple
- Testimonials
Blockquote
- Text
- Text Color
- Width
- Line Height
- Background Color
- Border Color
Button
- Type: Normal and Transparent
- Size: Small, Medium, Large, Huge and Full Width
- Text
- Icon Pack - choose from Font Awesome or Elegant Icons pack
- Icon
- Icon Color
- Link
- Link Target: Self, Blank, Top and Parent
- Color
- Hover Color
- Background Color
- Background Hover Color
- Border Color
- Border Hover Color
- Font Style: Normal and Italic
- Font Weight: 100, 200, 300, 400, 500, 600, 700, 800 and 900
- Text Align: Left, Right and Center
- Margin
Call To Action
- Type: Normal, With Icon and Centered (without columns)
- Action Box Padding
- Icon Pack: choose from Font Awesome Icon pack and Elegant Icons
- Icon
- Custom Icon
- Text Left Padding
- Background Color
- Border Color
- Title
- Title Tag
- Title Color
- Text
- Text Color
- Show Button: Yes/No
- Button Text
- Button Position (Left, Center and Right)
- Button Link
- Button Size
- Button Text Color
- Button Hover Text Color
- Button Background Color
- Button Hover Background Color
- Button Border Color
- Button Border Color
- Button Icon Pack: Font Awesome icons list or Elegant Icons
- Button Icon
Columns
Counter
- Type: Zero Counter and Random Counter
- Box: Yes/No
- Box Background Color
- Box Border Color
- Position (Left, Right and Center)
- Digit
- Digit Color
- Digit Color on End
- Digit Size (px)
- Title
- Title Tag: h2, h3, h4, h5 and h6
- Title Color
- Text
- Text Size (px)
- Text Color
Cover Boxes
- Active Element
- Image 1
- Title 1
- Title Color 1
- Text 1
- Text Color 1
- Link 1
- Link Label 1
- Target 1
- Image 2
- Title 2
- Title Color 2
- Text 2
- Text Color 2
- Link 2
- Link Label 2
- Target 2
- Image 3
- Title 3
- Title Color 3
- Text 3
- Text Color 3
- Link 3
- Link Label 3
- Target 3

Custom Font
- Font Family: You can add here system fonts (like Arial, Times New Roman etc.) and Google Font if you include it in Select options
- Font Size
- Line Height
- Font Style: Normal and Italic
- Text Align: Left, Right and Center
- Font Weight
- Color
- Text Decoration: None, Underline, Overline and Line Through
- Text Shadow: Yes/No
- Background Color
- Padding
- Margin
- Content
- Show Dots
Dropcaps
- Type: Normal, Square and Circle
- Letter
- Letter Color
- Background Color (Only When Type are Square or Circle)
- Border Color
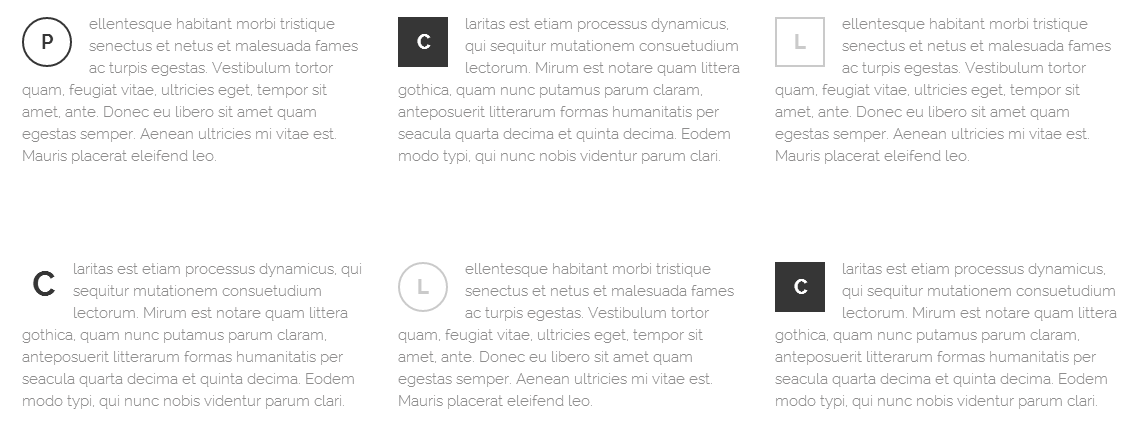
Image Hover
- Image
- Hover Image
- Link
- Target
- Animation: Yes/No
- Transition Delay (ms)
Interactive Banners
- Width: 1/2 , 1/3 and 1/4
- Image
- Icon Pack: Font Awesome icons list or Elegant Icons
- Icon
- Custom Icon Size
- Icon Color
- Title
- Title Color
- Title Size
- Title Tag: h2, h3, h4, h5 and h6
- Link
- Target: Self, Blank and Parent
- Link Text
- Link Color
- Link Background Color
- Link Border Color
- Hover Content
Default width for image with text over shortcode is 100%.
Icon
- Icon Pack: Font Awesome icons list or Elegant Icons
- Icon
- Icon Color
- Icon Hover Color
- Icon Size: Tiny, Small, Medium, Large and Very large (only for Font Awesome Icon set)
- Custom Size: enter icon size in pixels. Applied only for Elegant Icon set
- Type: Normal, Square and Circle
- Position: Normal, Left, Right and Center
- Border Color
- Border Hover Color
- Background Color
- Background Hover Color
- Margin
- Icon Animation: Yes / No
- Icon Animation Delay (ms)
- Link
- Target: Self, Blank and Parent
If you set Icon Animation attribute to yes icon will fade in when it comes in viewport.
Icon List Item
- Icon Pack: Font Awesome icons list or Elegant Icon set
- Icon
- Icon Type: Normal and Small
- Icon Color
- Border Type: circle or square
- Border Color
- Title
- Title Color
- Title Size
Icon With Text
- Box Type: Normal and Icon in a Box
- Box Border: Yes / No (only for icon in a box)
- Box Border Color
- Box Background Color
- Icon Pack: Font Awesome icons list or Elegant Icons
- Icon
- Icon Type: Normal, Square and Circle
- Icon Size / Icon Space From Text: Tiny, Small, Medium, Large and Very Large
- Custom Icon Size
- Text Left Padding
- Icon Animation: Yes / No
- Icon Animation Delay (ms)
- Icon Margin
- Image
- Icon Position: Top, Left, Left from Title and Top With Title Over
- Icon Margin
- Icon Border Color
- Icon Hover Border Color
- Icon Color
- Icon Hover Color
- Icon Background Color
- Icon Hover Background Color
- Title
- Title Tag: h2, h3, h4, h5 and h6
- Title Color
- Text
- Text Color
- Link
- Link Text
- Link Color
- Target: Self, Blank and Parent
If you set Icon Animation attribute to yes icon will fade in when it comes into the viewport.
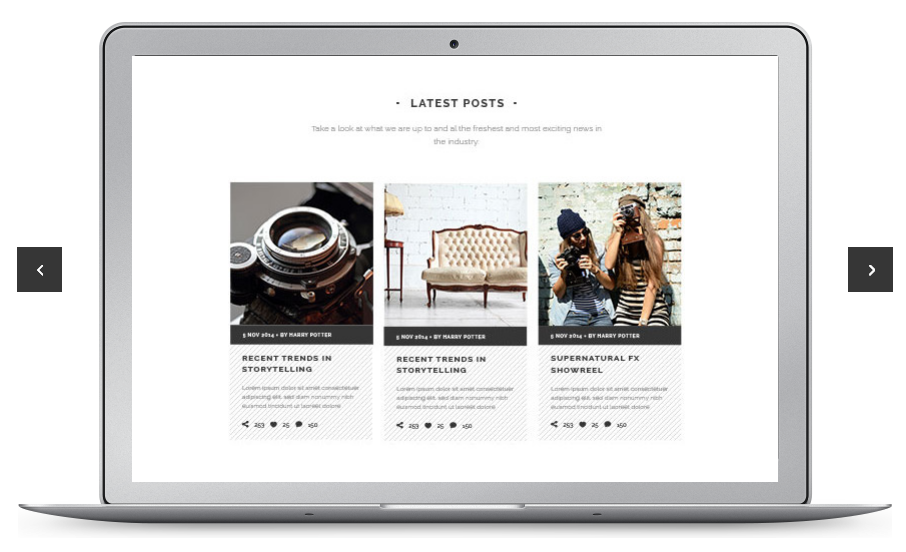
Latest Posts
- Type: Image in Left Box and Boxes
- Number of Posts
- Number of Columns (Only when type is Boxes): 2, 3 and 4
- Image Size: Portrait or Square (only for Boxes type)
- Order By: Menu Order, Title and Date
- Order: ASC and DESC
- Category Slug
- Boxes Background Color
- Boxes Background Pattern
- Pattern Image
- Text Length
- Title Tag: h2, h3, h4, h5 and h6
- Display Category: Yes/No
- Display Time: Yes/No
- Display Author
- Display Comments: Yes/No
- Display Like: Yes/No
- Display Share: Yes/No
- Display Read More
- Post Description Color
- Post Description Background Color
- Category Text Color
Latest Posts - Boxes
Latest Posts - Image
Line Graph
- Type: Rounded edges and Sharp edges
- Width
- Height
- Custom Color
- Scale Steps: Number of steps on y-axis
- Scale Step Width: Width between scale steps on y-axis
- Labels
List – Ordered
- Content
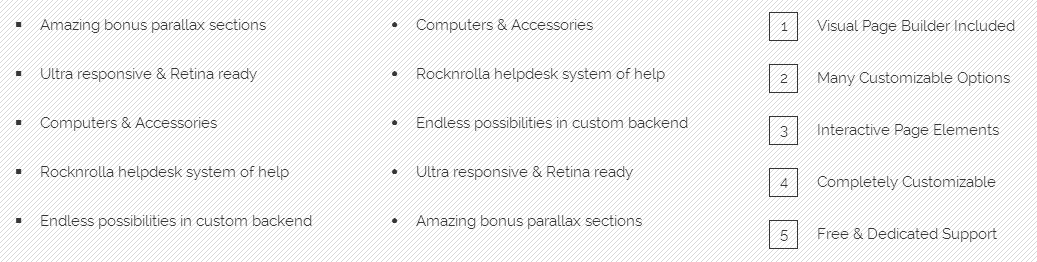
List – Unordered
- Style: Circle, Square and Number
- Animation List: Yes / No
- Content
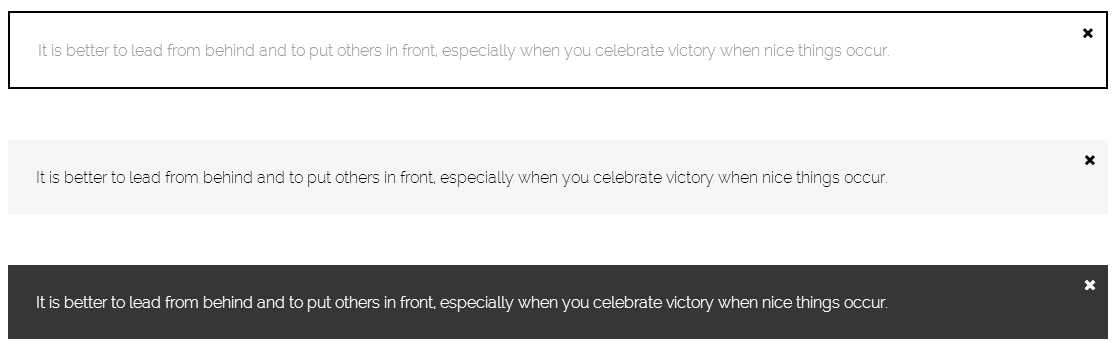
Message
- Type: Normal and With Icon
- Icon Pack: Font Awesome icons list or Elegant Icons set
- Icon
- Icon Size: Small, Medium and Large (only for Font Awesome icon set)
- Custom Size: only for Elegant Icons set
- Icon Color
- Icon Background Color
- Custom Icon
- Background Color
- Border Color
- Close Button Style: Dark and Light
- Content
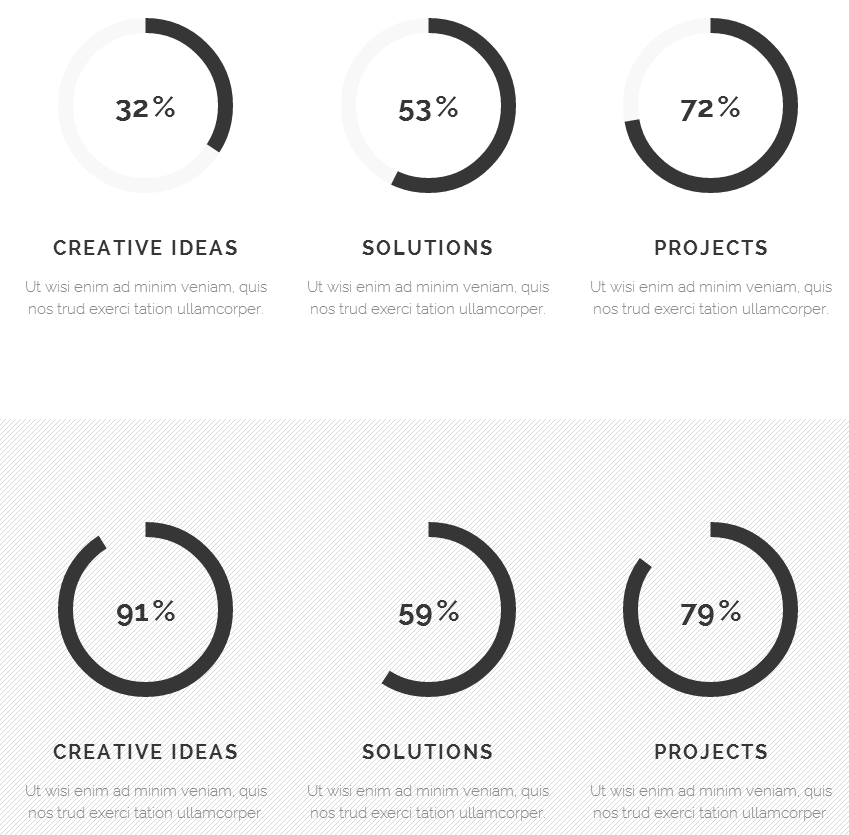
Pie Chart
- Percentage
- Percentage Color
- Show Percentage Mark: Yes / No
- Bar Active Color
- Bar Inactive Color
- Pie Chart Line Width
- Title
- Title Color
- Title Tag: h2, h3, h4, h5 and h6
- Text
- Text Color
- Separator: Yes / No
- Separator Color
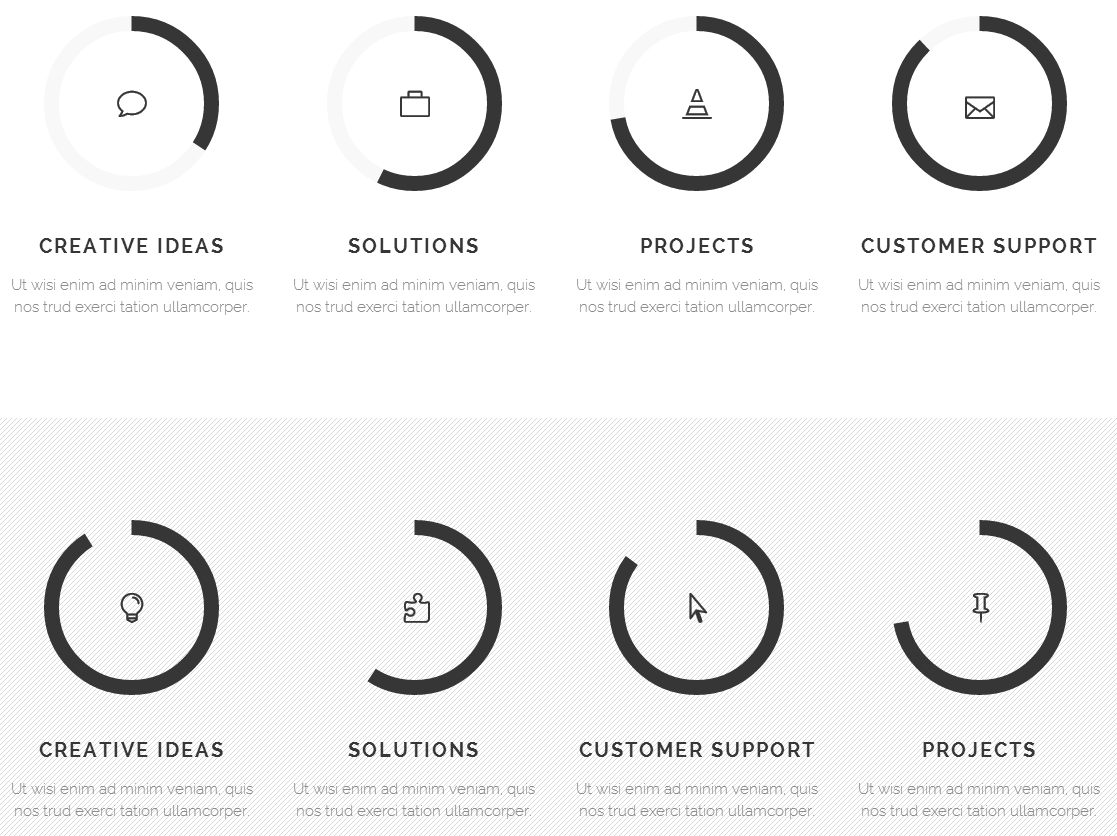
Pie Chart With Icon
- Percentage
- Bar Active Color
- Bar Inactive Color
- Pie Chart Line Width
- Title
- Title Color
- Icon Pack: Font Awesome icons list or Elegant Icon set
- Icon
- Icon Color
- Title Tag: h2, h3, h4, h5 and h6
- Text
- Text Color
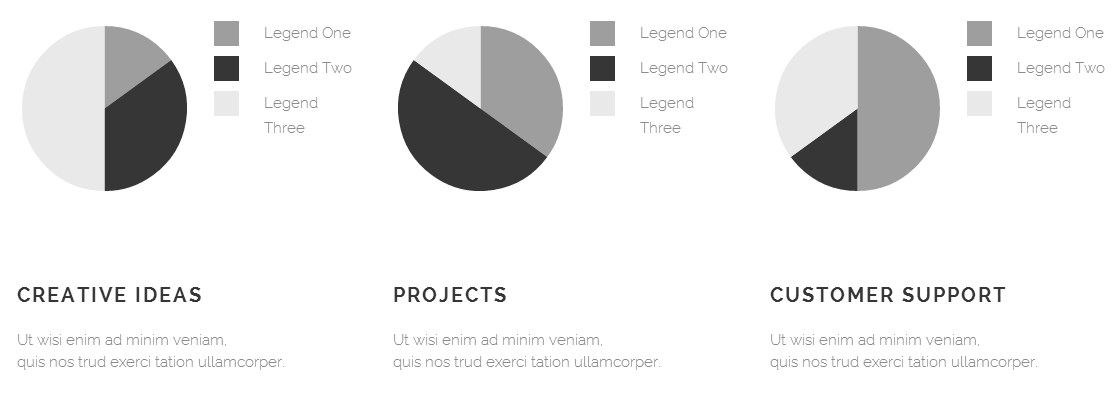
Pie Chart 2 (Pie)
- Width
- Height
- Legend Text Color
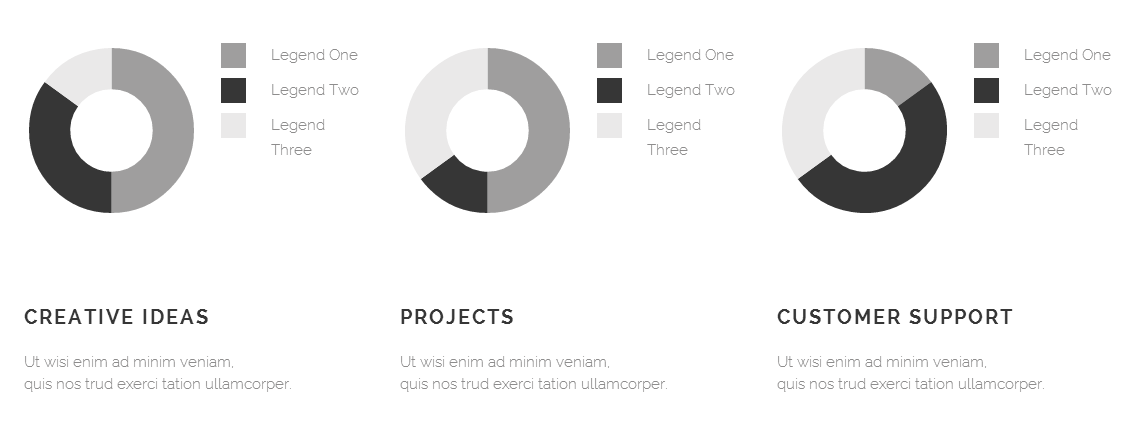
Pie Chart 3 (Doughnut)
- Width
- Height
- Legend Text Color
Portfolio Slider
- Number: Number of portfolio items
- Space Between Images
- Image Size: portrait or square
- Order By: Menu Order, Title and Date
- Order: ASC and DESC
- Category
- Selected Projects
- Lightbox: Yes / No
- Choose Link Type: Single Project Link Or Disabled
- Title Tag: h2, h3, h4, h5 and h6

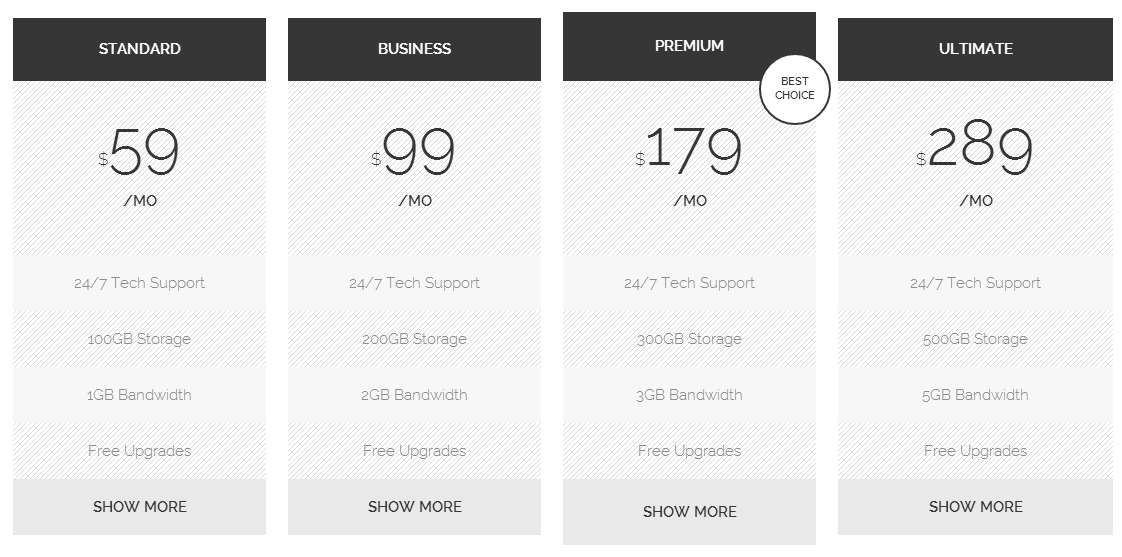
Select Pricing Table Holder
- Numbers of Pricing Table Items: One, Two, Three, Four and Five
Select Pricing Table
- Price Title
- Price Title Text Color
- Price Title Background Color
- Price
- Price Color
- Currency
- Currency Color
- Price Period
- Price Period Color
- Active: Yes / No
- Active Text
- Active Text Color
- Active Background Color
- Active Border Color
- Button Link
- Button Link Target
- Button Text Color
- Button Holder Color
- Content
Progress Bar – Horizontal
- Title
- Title Color
- Title Tag: h2, h3, h4, h5 and h6
- Percentage
- Percentage Color
- Show Percentage Mark: Yes / No
- Active Background Color
- Inactive Background Color
- Progress bar Height (px)
Select Progress Bar Vertical Holder
- Numbers of Progress Bar Items: One, Two, Three, Four, Five, Six, Seven and Twelve
Select Progress Bar Vertical
- Title
- Title Color
- Title Tag: h2, h3, h4, h5 and h6
- Title Size
- Bar Background Color
- Active Background Color
- Percent
- Percentage Text Size
- Percentage Color
- Text
- Text Color
Progress Bar – Icon
- Number of Icons
- Number of Active Icons
- Type: Normal, Circle and Square
- Icon Pack: Font Awesome icons list or Elegant Icon set
- Icon
- Icon Size: Tiny, Small, Medium, Large and Very Large
- Icon Color
- Icon Active Color
- Background Color
- Background Active Color
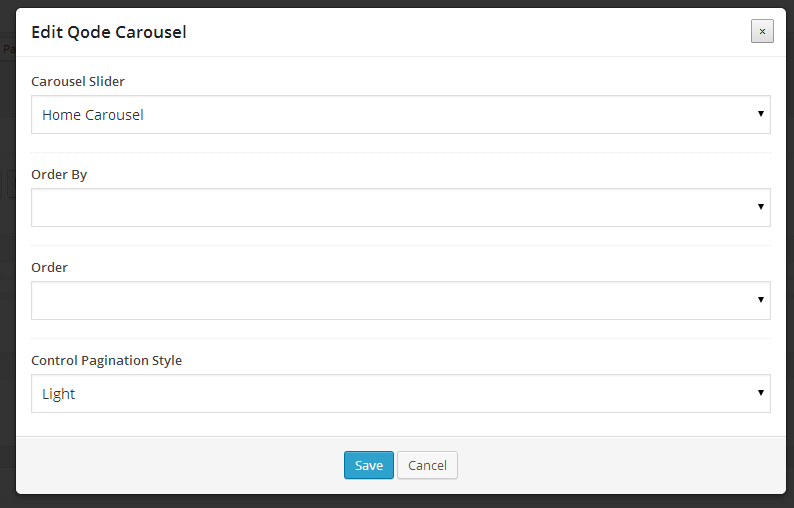
Select Carousels
- Carousel Slider
- Order By: Menu Order, Title and Date
- Order: ASC and DESC

- Carousel Items
- Add New Carousel Item
- Carousels
In "Carousel Items" section you can see all items that you created.
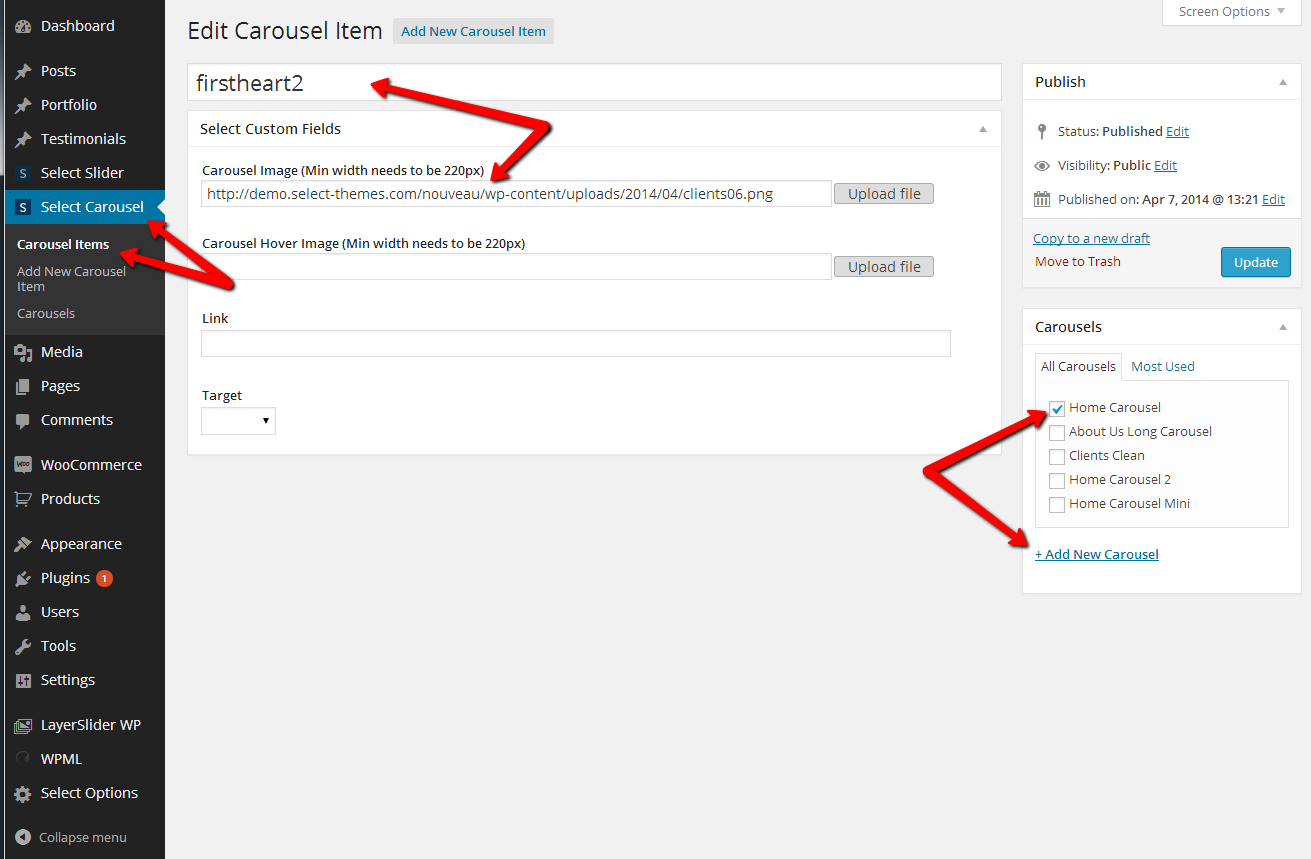
Add New Carousel Item - Click here to add your first carousel item. First you need to upload some image for your carousel item. Find Carousel Image field and upload your image. Also you can upload hover image for this Carousel item, just findCarousel Hover Image field and click upload. Minimal width for image size is 220px.
- Link
- Target
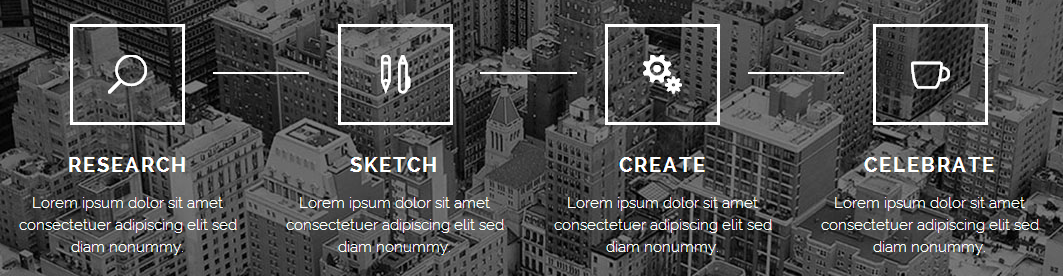
Select Process Holder
- Columns: Three, Four and Five
- Line Between Process: Yes/No
- Animated Process
Select Process Holder shortocode is holder for Select Process shortcode
Select Process
- Type: Icon in Process and Text in Process
- Background Process Color
- Background Process Image
- Border Process Color
- Icon Pack: Font Awesome icons or Elegant Icon set
- Icon
- Custom Icon Size
- Icon Color
- Icon Border Color
- Text in Process
- Text in Proces Color
- Text in Process Size (px)
- Link
- Target: Self, Blank and Parent
- Title
- Title Tag: h2, h3, h4, h5 and h6
- Title Color
- Text
- Text Color
- Show Separator Between Title and Text
- Separator Color
- Line Color Between Process
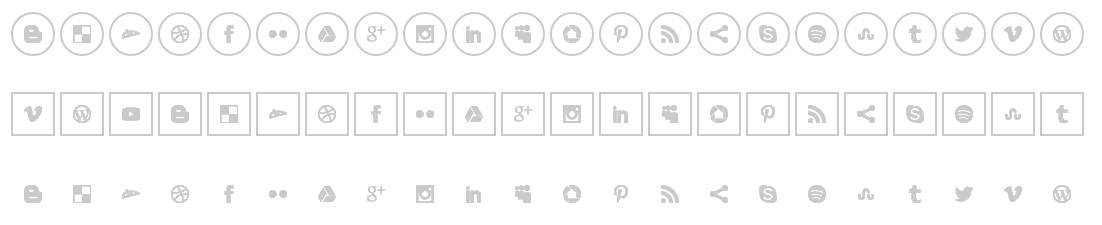
Social Icons
- Type: Normal, Circle and Square
- Icon Pack: Font Awesome icons or Elegant Icon set
- Icon
- Icon Size: Small, Normal, Large and Very Large
- Link
- Target: Self, Blank and Parent
- Icon Color
- Background Color
- Background Transparency
- Icon Hover Color
- Background Hover Color
- Background Hover Transparency
- Border Color
- Border Hover Color
Default hover color for all socail icons are social main color
Social Share
To enable Social share you need to go in your back-end Select options -> Social -> Select yes and save. We have implemented seven differents social media (Facebook, Twitter, Google +, LinkedIn, Thumblr, Pinterest and VK).
Team
- Image
- Name
- Name Color
- Position
- Position Color
- Description
- Description Color
- Social Icon Size: Normal, Medium and Large
- Social Icon Pack 1
- Social Icon 1
- Social Icon 1 Link
- Social Icon 1 Target: Self, Blank and Parent
- Social Icon Pack 2
- Social Icon 2
- Social Icon 2 Link
- Social Icon 2 Target: Self, Blank and Parent
- Social Icon Pack 3
- Social Icon 3
- Social Icon 3 Link
- Social Icon 3 Target: Self, Blank and Parent
- Social Icon Pack 4
- Social Icon 4
- Social Icon 4 Link
- Social Icon 4 Target: Self, Blank and Parent
- Social Icon Pack 5
- Social Icon 5
- Social Icon 5 Link
- Social Icon 5 Target: Self, Blank and Parent
Team Simple
- Image
- Background Color
- Name
- Name Color
- Position
- Position Color
- Link
- Target: Self, Blank and Parent

Testimonials
- Type: Simple and Standard
- Category
- Number
- Text Color
- Text / Author Align
- Author Color
- Background Color
- Border Color
- Show Author Image
- Control Navigation
- Control Navigation Active Color: Black and White
WooCommerce
Soho Theme comes with WooCommerce integration, which allows you to build online shop.
For more details on installing and configuring WooCommerce, please visit this page:
http://docs.woothemes.com/documentation/plugins/woocommerce/getting-started/
In order to setup WooCommerce with our theme please perform following steps:
- Go to Plugins in the left menu
- Click on Add New
- Type "WooCommerce" in the search field
- Locate "WooCommerce - excelling eCommerce" in the search results and click on Install Now below it
- Once install is done, click on Activate Plugin
- You will see a notice saying "Welcome to WooCommerce – You're almost ready to start selling :)". If you plan to import demo content click on "Skip Setup"
- Go to Importing demo content instructions in the Introduction section of this document and perform the process explained there
- Once import is completed click on Pages tab of the WooCommerce Settings
- Select existing pages for all field except Terms Page ID. You will be able to find all pages easily as they match name of each field
When you import all pages for woocommerce or when you create shop page, you need to go to your back-end and to select WooCommerce Template for all your shop pages.
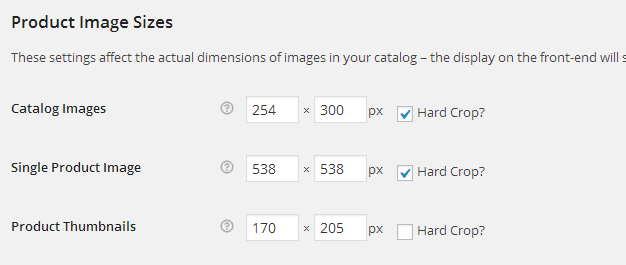
Woocommerce Shop Layout
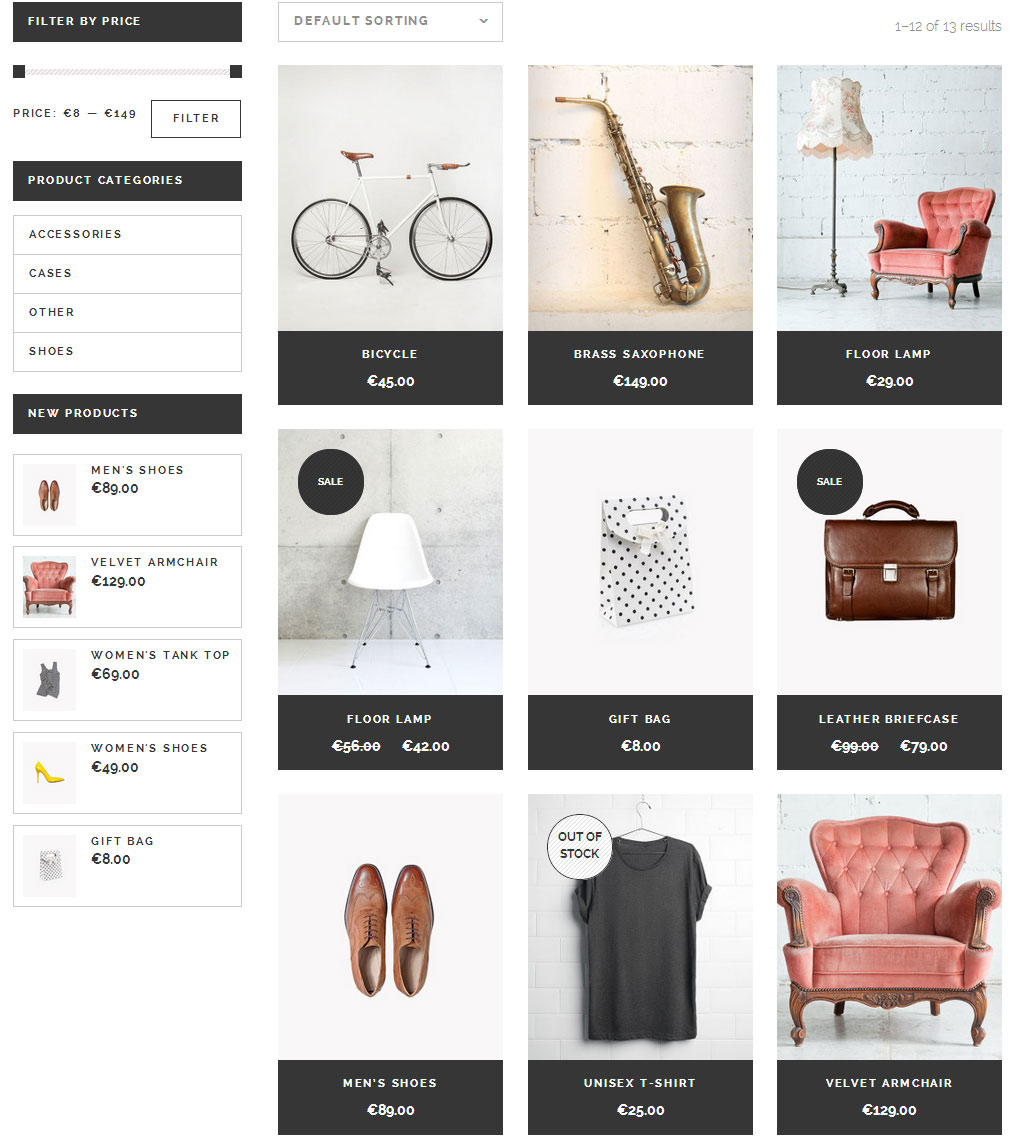
Woocommerce Settings for Images